Jitsi with Docker
Build Your Own Free Video Conference System
This post “Jitsi with Docker” was updated by: Syed Umar Bukhari on September 29, 2021
Jitsi is an open source video conference application that is installed on its server. This video conferencing application provides an SDK for those of you to create video conference applications for mobile. In this post we will build a video conferencing system on Jitsi with Docker. There are many ways to do so; one of the main ways is by using Jitsi as a distributor of IFRAME API JITSI while others deal with LIB-JITSI-MEET API integration into the applications.
How To Configure Jitsi With Docker?
You can create a custom application suitable for the UI you create and integrate it with Jitsi API. You can find API docs on Jitsi docs. As such, An active support community make Jitsi increasingly popular.

In this post, you will create a video conference app with Jitsi that will run on Docker and learn about the many ways you can do so.
Why Use Docker To Build Jitsi?
We will run the server on AWS, but you can run on other Cloud services.. In this case, use Ubuntu Server 18.04 to run Jitsi on Docker. After that, you need to install Alsa-loopback module.
In addition, you need to install Docker and Docker-Compose. I will assume you have already installed Docker and Docker-Compose on the server before proceeding.
Add Alsa-Loopback Kernel Module On Ubuntu
Alsa-loopback module requires Jibri to make live streaming and recording possible on the Jitsi video conference server. This module is not present on AWS Ubuntu Server by default. Hence, we need to add and enable it manually. To do so, use a generic kernel to make alsa-loopback work on the server.
After that, the next few steps are to provide guidance to replace the AWS kernel with a generic AWS kernel. In this case, select Ubuntu on AWS; we recommend doing so in order follow along.
If you have created an EC2 machine with this version, log in to the server and install alsa-utils with this command:
sudo apt install alsa-utils -y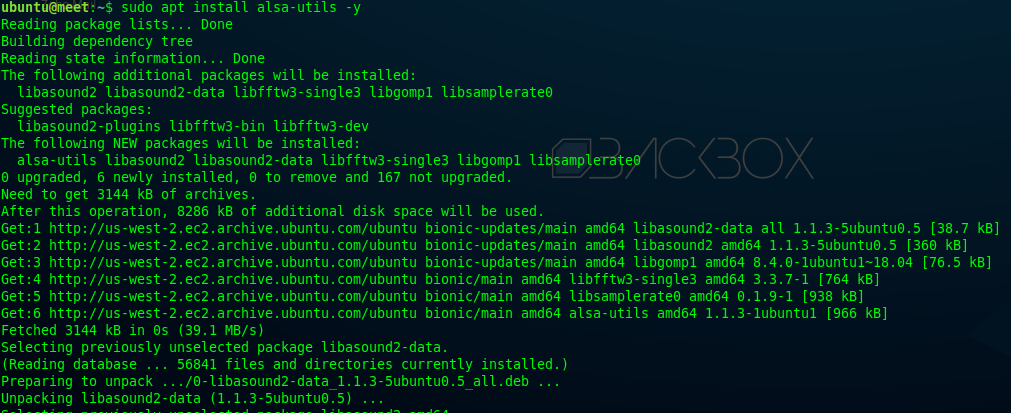
To ensure installation of alsa-loopback, enter this command:
arecord -L
If there is an error when running the command, we must make changes in the AWS kernel to get a GENERIC kernel:
If output : nullDiscard all samples (playback) or generate zero samples (capture)

Then, for the next step, search for a generic Linux module with the following command:
apt search
sudo apt search linux-modules-5.4.0 | grep generic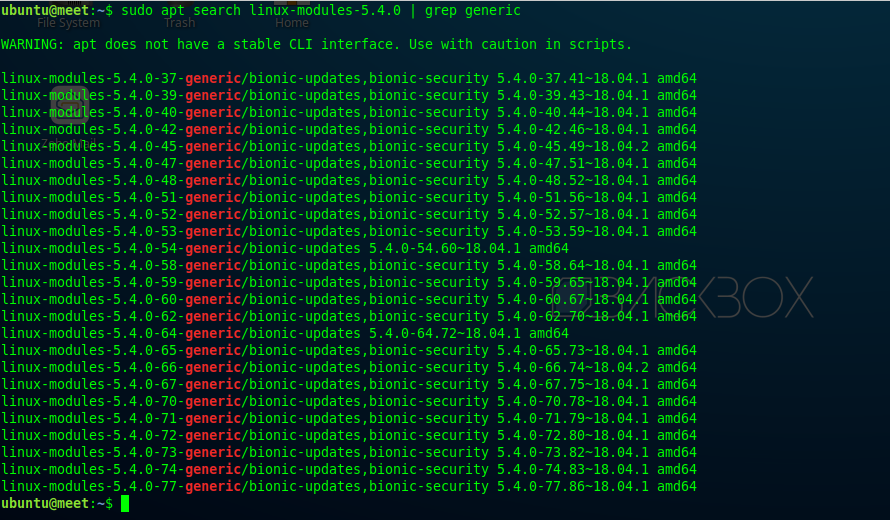
Install Kernel Generic AWS
If you find a generic Linux module– linux-modules-5.4.0-77-generic, use it. After that, install it on the EC2 machine.
sudo apt install linux-image-5.4.0-77-generic linux-modules-5.4.0-77-generic linux-modules-extra-5.4.0-77-generic -y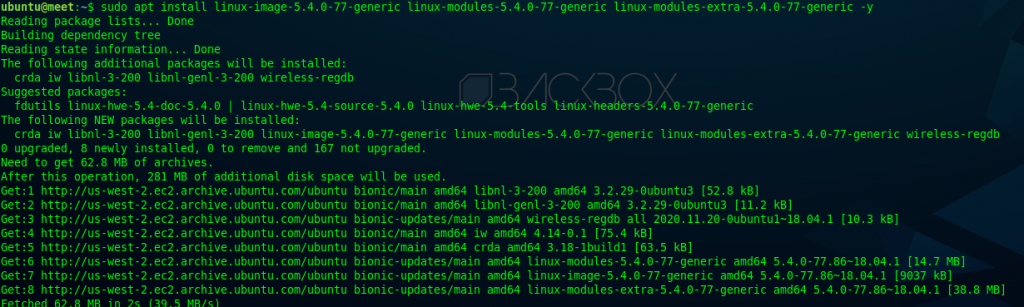
Then, next step is to try to find the menu entry in the Linux grub– so that the AWS kernel can be changed to the newly installed GENERIC kernel.
sudo grep -A100 submenu /boot/grub/grub.cfg | grep menuentry
This is it: we’ve got the menu entry for generic kernel modules.
After that, we need to change GRUB_DEFAULT on the EC2 machine to use generic kernel modules in the file /etc/default/grub. We will replace GRUB_DEFAULT with the sed command on linux.
sudo sed -i -e 's/GRUB_DEFAULT=0/GRUB_DEFAULT="gnulinux-advanced-6156ec80-9446-4eb1-95e0-9ae6b7a46187>gnulinux-5.4.0-77-generic-advanced-6156ec80-9446-4eb1-95e0-9ae6b7a46187"/' /etc/default/grub
Since GRUB_DEFAULT has been replaced with generic Linux modules, update Linux grub using the command:
update-grub
sudo update-grub
Therefore, Linux grub has updated successfully.
Now, reboot the server to see if the kernel changed from AWS to the generic kernel. Use this command to reboot the server:
reboot

Reboot Server
After rebooting the server, check if the kernel changed from AWS to GENERIC with this command:
uname -r

Since the kernel has been successfully changed to GENERIC, it’s time to activate the alsa-loopback module.
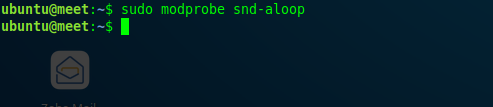
Activate it with this command:
modprobe snd-aloop
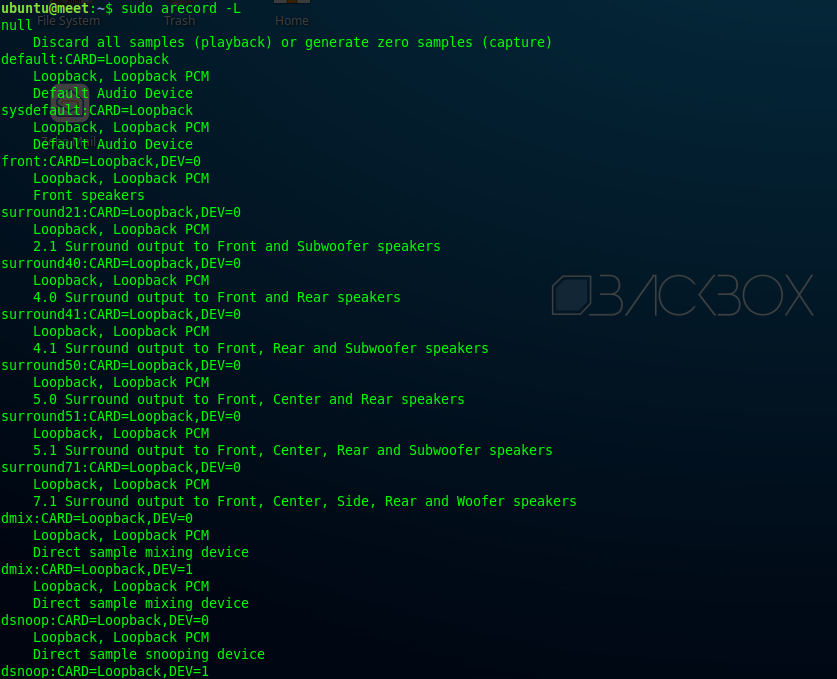
Hence, the alsa-loopback module has been activated. After that, check if the module is active on the server.
arecord -L
Jitsi With Docker
Since the alsa-loopback module is already active on the server, move to next step.
For the next step, use Jitsi Docker from the Jitsi Github repository– Jitsi has provided a docker configuration in its repository.
git clone https://github.com/jitsi/docker-jitsi-meet.git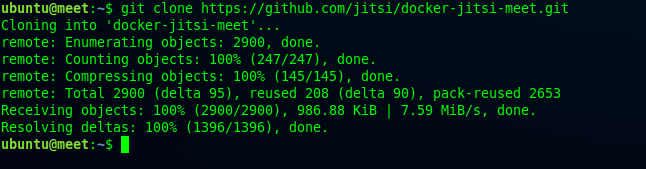
After that, move to the docker-jitsi-meet directory for configuration of some files. You can enable recording and streaming on Jitsi here.
cd docker-jitsi-meet/Docker-Compose & Jitsi
To configure the env file in Docker Jitsi, it is necessary to pay attention here.
Create a Jitsi Docker using a network with its own domain. Firstly, change the network and its alias from meet.jitsi to your own domain. Let’s edit docker-compose.yml to do so.
Front-End Jitsi Landing Page
version: '3'

services:
    # Frontend
    web:
        image: jitsi/web:latest
        restart: ${RESTART_POLICY}
        ports:
            - '${HTTP_PORT}:80'
            - '${HTTPS_PORT}:443'
        volumes:
            - ${CONFIG}/web:/config:Z
            - ${CONFIG}/transcripts:/usr/share/jitsi-meet/transcripts:Z
        environment:
            - ENABLE_COLIBRI_WEBSOCKET
            - ENABLE_FLOC
            - ENABLE_LETSENCRYPT
            - ENABLE_HTTP_REDIRECT
            - ENABLE_HSTS
            - ENABLE_XMPP_WEBSOCKET
            - DISABLE_HTTPS
            - DISABLE_DEEP_LINKING
            - LETSENCRYPT_DOMAIN
            - LETSENCRYPT_EMAIL
            - LETSENCRYPT_USE_STAGING
            - PUBLIC_URL
            - TZ
            - AMPLITUDE_ID
            - ANALYTICS_SCRIPT_URLS
            - ANALYTICS_WHITELISTED_EVENTS
            - CALLSTATS_CUSTOM_SCRIPT_URL
            - CALLSTATS_ID
            - CALLSTATS_SECRET
            - CHROME_EXTENSION_BANNER_JSON
            - CONFCODE_URL
            - CONFIG_EXTERNAL_CONNECT
            - DEFAULT_LANGUAGE
            - DEPLOYMENTINFO_ENVIRONMENT
            - DEPLOYMENTINFO_ENVIRONMENT_TYPE
            - DEPLOYMENTINFO_REGION
            - DEPLOYMENTINFO_SHARD
            - DEPLOYMENTINFO_USERREGION
            - DIALIN_NUMBERS_URL
            - DIALOUT_AUTH_URL
            - DIALOUT_CODES_URL
            - DROPBOX_APPKEY
            - DROPBOX_REDIRECT_URI
            - DYNAMIC_BRANDING_URL
            - ENABLE_AUDIO_PROCESSING
            - ENABLE_AUTH
            - ENABLE_CALENDAR
            - ENABLE_FILE_RECORDING_SERVICE
            - ENABLE_FILE_RECORDING_SERVICE_SHARING
            - ENABLE_GUESTS
            - ENABLE_IPV6
            - ENABLE_LIPSYNC
            - ENABLE_NO_AUDIO_DETECTION
            - ENABLE_P2P
            - ENABLE_PREJOIN_PAGE
            - ENABLE_WELCOME_PAGE
            - ENABLE_CLOSE_PAGE
            - ENABLE_RECORDING
            - ENABLE_REMB
            - ENABLE_REQUIRE_DISPLAY_NAME
            - ENABLE_SIMULCAST
            - ENABLE_STATS_ID
            - ENABLE_STEREO
            - ENABLE_SUBDOMAINS
            - ENABLE_TALK_WHILE_MUTED
            - ENABLE_TCC
            - ENABLE_TRANSCRIPTIONS
            - ETHERPAD_PUBLIC_URL
            - ETHERPAD_URL_BASE
            - GOOGLE_ANALYTICS_ID
            - GOOGLE_API_APP_CLIENT_ID
            - INVITE_SERVICE_URL
            - JICOFO_AUTH_USER
            - MATOMO_ENDPOINT
            - MATOMO_SITE_ID
            - MICROSOFT_API_APP_CLIENT_ID
            - NGINX_RESOLVER
            - NGINX_WORKER_PROCESSES
            - NGINX_WORKER_CONNECTIONS
            - PEOPLE_SEARCH_URL
            - RESOLUTION
            - RESOLUTION_MIN
            - RESOLUTION_WIDTH
            - RESOLUTION_WIDTH_MIN
            - START_AUDIO_ONLY
            - START_AUDIO_MUTED
            - START_WITH_AUDIO_MUTED
            - START_SILENT
            - DISABLE_AUDIO_LEVELS
            - ENABLE_NOISY_MIC_DETECTION
            - START_BITRATE
            - DESKTOP_SHARING_FRAMERATE_MIN
            - DESKTOP_SHARING_FRAMERATE_MAX
            - START_VIDEO_MUTED
            - START_WITH_VIDEO_MUTED
            - TESTING_CAP_SCREENSHARE_BITRATE
            - TESTING_OCTO_PROBABILITY
            - XMPP_AUTH_DOMAIN
            - XMPP_BOSH_URL_BASE
            - XMPP_DOMAIN
            - XMPP_GUEST_DOMAIN
            - XMPP_MUC_DOMAIN
            - XMPP_RECORDER_DOMAIN
            - TOKEN_AUTH_URL
        networks:
            meet.busanid.dev:
Prosody Configuration Network
# XMPP server
    prosody:
        image: jitsi/prosody:latest
        restart: ${RESTART_POLICY}
        expose:
            - '5222'
            - '5347'
            - '5280'
        volumes:
            - ${CONFIG}/prosody/config:/config:Z
            - ${CONFIG}/prosody/prosody-plugins-custom:/prosody-plugins-custom:Z
        environment:
            - AUTH_TYPE
            - ENABLE_AUTH
            - ENABLE_GUESTS
            - ENABLE_LOBBY
            - ENABLE_XMPP_WEBSOCKET
            - GLOBAL_MODULES
            - GLOBAL_CONFIG
            - LDAP_URL
            - LDAP_BASE
            - LDAP_BINDDN
            - LDAP_BINDPW
            - LDAP_FILTER
            - LDAP_AUTH_METHOD
            - LDAP_VERSION
            - LDAP_USE_TLS
            - LDAP_TLS_CIPHERS
            - LDAP_TLS_CHECK_PEER
            - LDAP_TLS_CACERT_FILE
            - LDAP_TLS_CACERT_DIR
            - LDAP_START_TLS
            - XMPP_DOMAIN
            - XMPP_AUTH_DOMAIN
            - XMPP_GUEST_DOMAIN
            - XMPP_MUC_DOMAIN
            - XMPP_INTERNAL_MUC_DOMAIN
            - XMPP_MODULES
            - XMPP_MUC_MODULES
            - XMPP_INTERNAL_MUC_MODULES
            - XMPP_RECORDER_DOMAIN
            - XMPP_CROSS_DOMAIN
            - JICOFO_COMPONENT_SECRET
            - JICOFO_AUTH_USER
            - JICOFO_AUTH_PASSWORD
            - JVB_AUTH_USER
            - JVB_AUTH_PASSWORD
            - JIGASI_XMPP_USER
            - JIGASI_XMPP_PASSWORD
            - JIBRI_XMPP_USER
            - JIBRI_XMPP_PASSWORD
            - JIBRI_RECORDER_USER
            - JIBRI_RECORDER_PASSWORD
            - JWT_APP_ID
            - JWT_APP_SECRET
            - JWT_ACCEPTED_ISSUERS
            - JWT_ACCEPTED_AUDIENCES
            - JWT_ASAP_KEYSERVER
            - JWT_ALLOW_EMPTY
            - JWT_AUTH_TYPE
            - JWT_TOKEN_AUTH_MODULE
            - LOG_LEVEL
            - PUBLIC_URL
            - TZ
        networks:
            meet.busanid.dev:
                aliases:
                    - ${XMPP_SERVER}
Change Jicofo Network
 # Focus component
    jicofo:
        image: jitsi/jicofo:latest
        restart: ${RESTART_POLICY}
        volumes:
            - ${CONFIG}/jicofo:/config:Z
        environment:
            - AUTH_TYPE
            - BRIDGE_AVG_PARTICIPANT_STRESS
            - BRIDGE_STRESS_THRESHOLD
            - ENABLE_AUTH
            - ENABLE_AUTO_OWNER
            - ENABLE_CODEC_VP8
            - ENABLE_CODEC_VP9
            - ENABLE_CODEC_H264
            - ENABLE_OCTO
            - ENABLE_RECORDING
            - ENABLE_SCTP
            - JICOFO_AUTH_USER
            - JICOFO_AUTH_PASSWORD
            - JICOFO_ENABLE_BRIDGE_HEALTH_CHECKS
            - JICOFO_CONF_INITIAL_PARTICIPANT_WAIT_TIMEOUT
            - JICOFO_CONF_SINGLE_PARTICIPANT_TIMEOUT
            - JICOFO_ENABLE_HEALTH_CHECKS
            - JICOFO_SHORT_ID
            - JICOFO_RESERVATION_ENABLED
            - JICOFO_RESERVATION_REST_BASE_URL
            - JIBRI_BREWERY_MUC
            - JIBRI_REQUEST_RETRIES
            - JIBRI_PENDING_TIMEOUT
            - JIGASI_BREWERY_MUC
            - JIGASI_SIP_URI
            - JVB_BREWERY_MUC
            - MAX_BRIDGE_PARTICIPANTS
            - OCTO_BRIDGE_SELECTION_STRATEGY
            - TZ
            - XMPP_DOMAIN
            - XMPP_AUTH_DOMAIN
            - XMPP_INTERNAL_MUC_DOMAIN
            - XMPP_MUC_DOMAIN
            - XMPP_SERVER
        depends_on:
            - prosody
        networks:
            meet.busanid.dev:
Videobridge2 Network Docker Compose
# Video bridge
    jvb:
        image: jitsi/jvb:latest
        restart: ${RESTART_POLICY}
        ports:
            - '${JVB_PORT}:${JVB_PORT}/udp'
            - '${JVB_TCP_PORT}:${JVB_TCP_PORT}'
        volumes:
            - ${CONFIG}/jvb:/config:Z
        environment:
            - ENABLE_COLIBRI_WEBSOCKET
            - ENABLE_OCTO
            - DOCKER_HOST_ADDRESS
            - XMPP_AUTH_DOMAIN
            - XMPP_INTERNAL_MUC_DOMAIN
            - XMPP_SERVER
            - JVB_AUTH_USER
            - JVB_AUTH_PASSWORD
            - JVB_BREWERY_MUC
            - JVB_PORT
            - JVB_TCP_HARVESTER_DISABLED
            - JVB_TCP_PORT
            - JVB_TCP_MAPPED_PORT
            - JVB_STUN_SERVERS
            - JVB_ENABLE_APIS
            - JVB_WS_DOMAIN
            - JVB_WS_SERVER_ID
            - PUBLIC_URL
            - JVB_OCTO_BIND_ADDRESS
            - JVB_OCTO_PUBLIC_ADDRESS
            - JVB_OCTO_BIND_PORT
            - JVB_OCTO_REGION
            - TZ
        depends_on:
            - prosody
        networks:
            meet.busanid.dev:
                aliases:
                    - jvb.meet.busanid.dev

# Custom network so all services can communicate using a FQDN
networks:
    meet.busanid.dev:
Configure .Env File
We have edited the docker-compose.yml file according to our own network. You can edit it according to your server; first you need to copy env.example to .env with the command “cp env.example .env”.
cp env.example .env
Let’s edit something on the env file; you can read the use cases of each function contained in the env file in the Jitsi docker documentation.
Editing The Configuration (With Code)
Port And Location Config
# Directory where all configuration will be stored
CONFIG=~/.jitsi-meet-cfg

# Exposed HTTP port
HTTP_PORT=80

# Exposed HTTPS port
HTTPS_PORT=443

# System time zone
TZ=UTC

# Public URL for the web service (required)
PUBLIC_URL=https://meet.busanid.dev

# IP address of the Docker host
# See the "Running behind NAT or on a LAN environment" section in the Handbook:
# https://jitsi.github.io/handbook/docs/devops-guide/devops-guide-docker#running-behind-nat-or-on-a-lan-environment
DOCKER_HOST_ADDRESS=192.168.1.10

# Control whether the lobby feature should be enabled or not
ENABLE_LOBBY=1

# Show a prejoin page before entering a conference
ENABLE_PREJOIN_PAGE=0

# Enable the welcome page
ENABLE_WELCOME_PAGE=1

# Enable the close page
ENABLE_CLOSE_PAGE=0

# Disable measuring of audio levels
DISABLE_AUDIO_LEVELS=0

# Enable noisy mic detection
ENABLE_NOISY_MIC_DETECTION=1
Guest Access Conference
# Authentication configuration (see handbook for details)
#

# Enable authentication
#ENABLE_AUTH=1

# Enable guest access
ENABLE_GUESTS=1

# Select authentication type: internal, jwt or ldap
#AUTH_TYPE=internal
Letsencrypt For SSS Https
# Let's Encrypt configuration
#

# Enable Let's Encrypt certificate generation
ENABLE_LETSENCRYPT=1

# Domain for which to generate the certificate
LETSENCRYPT_DOMAIN=meet.busanid.dev

# E-Mail for receiving important account notifications (mandatory)
[email protected]

# Use the staging server (for avoiding rate limits while testing)
#LETSENCRYPT_USE_STAGING=1
Xmpp Server With Own Domain
# Internal XMPP domain
XMPP_DOMAIN=meet.busanid.dev

# Internal XMPP server
XMPP_SERVER=xmpp.meet.busanid.dev

# Internal XMPP server URL
XMPP_BOSH_URL_BASE=http://xmpp.meet.busanid.dev:5280

# Internal XMPP domain for authenticated services
XMPP_AUTH_DOMAIN=auth.meet.busanid.dev

# XMPP domain for the MUC
XMPP_MUC_DOMAIN=muc.meet.busanid.dev

# XMPP domain for the internal MUC used for jibri, jigasi and jvb pools
XMPP_INTERNAL_MUC_DOMAIN=internal-muc.meet.busanid.dev

# XMPP domain for unauthenticated users
XMPP_GUEST_DOMAIN=guest.meet.busanid.dev

# Comma separated list of domains for cross domain policy or "true" to allow all
# The PUBLIC_URL is always allowed
XMPP_CROSS_DOMAIN=true

# Custom Prosody modules for XMPP_DOMAIN (comma separated)
XMPP_MODULES=

# Custom Prosody modules for MUC component (comma separated)
XMPP_MUC_MODULES=

# Custom Prosody modules for internal MUC component (comma separated)
XMPP_INTERNAL_MUC_MODULES=
Videobridge And Rest API
# MUC for the JVB pool
JVB_BREWERY_MUC=jvbbrewery

# XMPP user for JVB client connections
JVB_AUTH_USER=jvb

# STUN servers used to discover the server's public IP
JVB_STUN_SERVERS=meet-jit-si-turnrelay.jitsi.net:443

# Media port for the Jitsi Videobridge
JVB_PORT=10000

# TCP Fallback for Jitsi Videobridge for when UDP isn't available
JVB_TCP_HARVESTER_DISABLED=true
JVB_TCP_PORT=4443
JVB_TCP_MAPPED_PORT=4443

# A comma separated list of APIs to enable when the JVB is started [default: none]
# See https://github.com/jitsi/jitsi-videobridge/blob/master/doc/rest.md for more information
JVB_ENABLE_APIS=rest,colibri
Enable Recording And Jibri
# Enable recording
ENABLE_RECORDING=1

# XMPP domain for the jibri recorder
XMPP_RECORDER_DOMAIN=recorder.meet.busanid.dev

# XMPP recorder user for Jibri client connections
JIBRI_RECORDER_USER=recorder

# Directory for recordings inside Jibri container
JIBRI_RECORDING_DIR=/config/recordings

# The finalizing script. Will run after recording is complete
#JIBRI_FINALIZE_RECORDING_SCRIPT_PATH=/config/finalize.sh

# XMPP user for Jibri client connections
JIBRI_XMPP_USER=jibri

# MUC name for the Jibri pool
JIBRI_BREWERY_MUC=jibribrewery

# MUC connection timeout
JIBRI_PENDING_TIMEOUT=90

# When jibri gets a request to start a service for a room, the room
# jid will look like: [email protected]_domain
# We'll build the url for the call by transforming that into:
# https://xmpp_domain/subdomain/roomName
# So if there are any prefixes in the jid (like jitsi meet, which
# has its participants join a muc at conference.xmpp_domain) then
# list that prefix here so it can be stripped out to generate
# the call url correctly
JIBRI_STRIP_DOMAIN_JID=muc

# Directory for logs inside Jibri container
JIBRI_LOGS_DIR=/config/logs
Redirect Env File To HTTPS
# Redirect HTTP traffic to HTTPS
# Necessary for Let's Encrypt, relies on standard HTTPS port (443)
ENABLE_HTTP_REDIRECT=1
Create a high-security password in env file. To generate it, use the command below.
./gen-passwords.shIn addition, we are required to create the config directory jitsi.
mkdir -p ~/.jitsi-meet-cfg/{web/letsencrypt,transcripts,prosody/config,prosody/prosody-plugins-custom,jicofo,jvb,jigasi,jibri}
Setting The jibri.yml
In this step, configure jibri in the jibri.yml file to replace network with your own domain.
Jibri functions to make recording and livestreaming on Jitsi seamless. Without a further ado, let’s edit the jibri.yml file.
version: '3'

services:
    jibri:
        image: jitsi/jibri:latest
        restart: ${RESTART_POLICY}
        volumes:
            - ${CONFIG}/jibri:/config:Z
            - /dev/shm:/dev/shm
        cap_add:
            - SYS_ADMIN
            - NET_BIND_SERVICE
        devices:
            - /dev/snd:/dev/snd
        environment:
            - PUBLIC_URL
            - XMPP_AUTH_DOMAIN
            - XMPP_INTERNAL_MUC_DOMAIN
            - XMPP_RECORDER_DOMAIN
            - XMPP_SERVER
            - XMPP_DOMAIN
            - JIBRI_XMPP_USER
            - JIBRI_XMPP_PASSWORD
            - JIBRI_BREWERY_MUC
            - JIBRI_RECORDER_USER
            - JIBRI_RECORDER_PASSWORD
            - JIBRI_RECORDING_DIR
            - JIBRI_FINALIZE_RECORDING_SCRIPT_PATH
            - JIBRI_STRIP_DOMAIN_JID
            - JIBRI_LOGS_DIR
            - DISPLAY=:0
            - TZ
        depends_on:
            - jicofo
        networks:
            meet.jitsi:
Change Network In Jibri
version: '3'

services:
    jibri:
        image: jitsi/jibri:latest
        restart: ${RESTART_POLICY}
        volumes:
            - ${CONFIG}/jibri:/config:Z
            - /dev/shm:/dev/shm
        cap_add:
            - SYS_ADMIN
            - NET_BIND_SERVICE
        devices:
            - /dev/snd:/dev/snd
        environment:
            - PUBLIC_URL
            - XMPP_AUTH_DOMAIN
            - XMPP_INTERNAL_MUC_DOMAIN
            - XMPP_RECORDER_DOMAIN
            - XMPP_SERVER
            - XMPP_DOMAIN
            - JIBRI_XMPP_USER
            - JIBRI_XMPP_PASSWORD
            - JIBRI_BREWERY_MUC
            - JIBRI_RECORDER_USER
            - JIBRI_RECORDER_PASSWORD
            - JIBRI_RECORDING_DIR
            - JIBRI_FINALIZE_RECORDING_SCRIPT_PATH
            - JIBRI_STRIP_DOMAIN_JID
            - JIBRI_LOGS_DIR
            - DISPLAY=:0
            - TZ
        depends_on:
            - jicofo
        networks:
            meet.busanid.dev:
The configuration is done. Therefore, you can build container now.
docker-compose -f docker-compose.yml -f jibri.yml up -d
You can use this command to check whether container is already running and up:
docker-compose -f docker-compose.yml -f jibri.yml ps

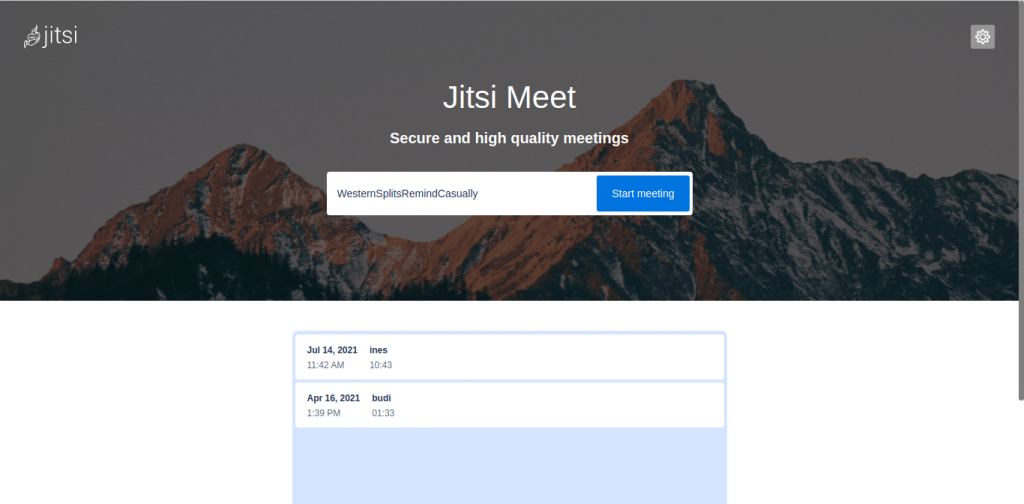
As visible, Jitsi services are running well in the containers. After that, try to access the video conference page to conference.
To do so, open this URL in a browser according to the domain you configured in the env file.:
https://meet.domainname.tld
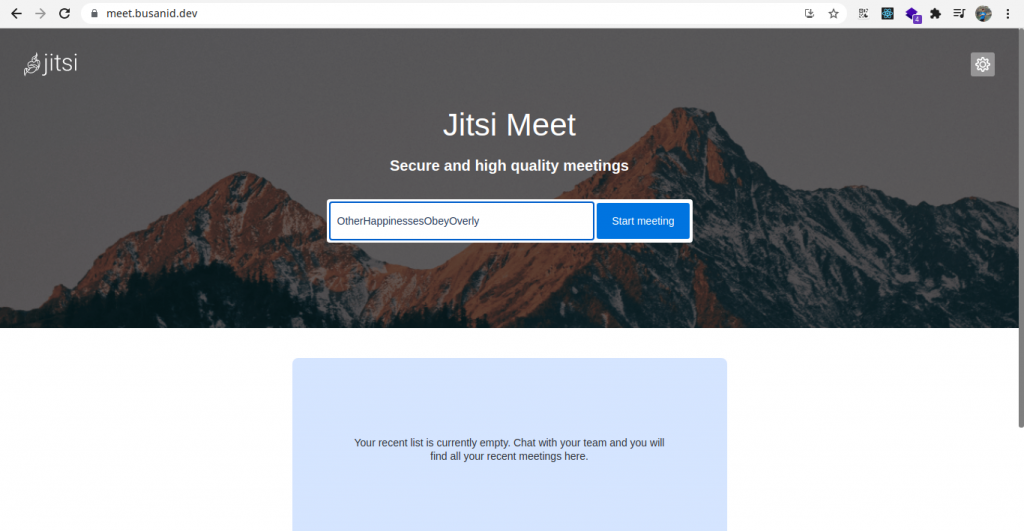
Jitsi front page is already successfully installed on server; let’s try to start conference.
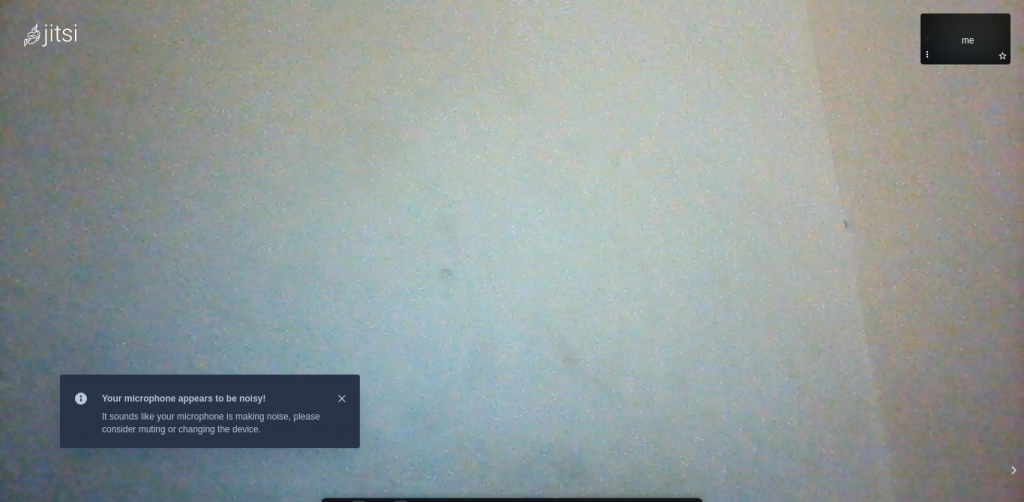
To conclude, building Jitsi on Docker is done– you can now start video conferencing with your own server.
If you want to save a file and with a large capacity, you can use SesameDisk for your choice of storage needs. Don’t forget to read other articles- we have hundreds of interesting tech posts!
Like, or comment, if you liked this post– or if you have any queries. I would love to hear if you were able to get it running by following this tutorial in the comments below.