MySQL master-slave replication with docker

This post “MySQL master-slave replication with docker” was updated by Syed Umar Bukhari on August 26, 2021.
As you may already know MySQL replication is a process to enable automatic copying of database(s) from one instance of MySQL to the other. Then docker and docker compose are orchestration tools. In this case, we will look at master-slave replication– the most popular way to replicate SQL databases, specifically MySQL. as a matter of fact we can create multiple slave servers for replication with a single master server.
For the post, we use docker and docker compose to create the replication on MySQL. Additionally, the code part of the post uses docker and docker-compose for MySQL master-slave replication. For this experiment we will use Ubuntu 18.04 as host OS. This host then runs the with docker and docker compose. With that said you can use Windows, CentOS, Mac OS, etc. for your experiment as docker abstracts you from most of the host OS. Before beginning the process, we assumed you have already installed docker and docker compose on your machine. If you haven’t, please do so before proceeding.
Why MySQL?
On a side note, let’s see a few reasons why MySQL is extremely popular as a database system. It is because it’s open source, has a lot of support from the community and the big tech companies. Similarly, by using SQL commands, MySQL can create, run, and query the database as well as build websites, application, it is quite efficient to use for the database designers. In addition, one of its most common uses is to build a wordpress (WP) websites.
By following this post you should be able to make your own database (DB) system much more resilient. Finally, if you want to take something out of why MySQL is important then know this— it lowers the learning curve, it’s free and it can scale to huge systems with billions of rows.
Create docker compose file
The docker compose file makes it easy for us to set some variables in the container, making the environment able to connect with the container. In addition, we use docker compose to run a multi-container environment based on the definitions in a YML file. After that, let’s create a docker compose file for replication as shown below:
version: '3'
services:
  mysql-master:
    image: percona:ps-8.0
    container_name: mysql-master
    restart: unless-stopped
    env_file: ./master/.env.master
    cap_add:
      - all
    volumes:
      - ./master/data:/var/lib/mysql
      - ./master/my.cnf:/etc/my.cnf
    environment:
      - TZ:${TZ}
      - MYSQL_USER:${MYSQL_USER}
      - MYSQL_PASSWORD:${MYSQL_PASSWORD}
      - MYSQL_ROOT_PASSWORD:${MYSQL_PASSWORD}
    networks:
      default:
        aliases:
          - mysql

  mysql-slave:
    image: percona:ps-8.0
    container_name: mysql-slave
    restart: unless-stopped
    env_file: ./slave/.env.slave
    cap_add:
      - all
    volumes:
      - ./slave/data:/var/lib/mysql
      - ./slave/my.cnf:/etc/my.cnf
    environment:
      - TZ:${TZ}
      - MYSQL_USER:${MYSQL_USER}
      - MYSQL_PASSWORD:${MYSQL_PASSWORD}
      - MYSQL_ROOT_PASSWORD:${MYSQL_ROOT_PASSWORD}
    networks:
      default:
        aliases:
          - mysql
In the docker compose file above, we use a different environment; in the MySQL master container we use an ENV file with the name .env.master. To differentiate, let’s create two folders: a master and slave folder– to separate the configuration for each container. Create folders using the command “mkdir”.
mkdir master && mkdir slave
We have created a new folder to separate the master and slave files. We will create 2 new files next: .env.master. and .env.slave to use later.
touch master/.env.master && touch slave/.env.slave
Configuring the ENV file for MySQL master-slave replication with docker
This env file contains variables crucial for the container’s creation in docker compose. Additionally, the file makes it easy for us to store some information. We will create two env files for master and slave respectively. We edit the env file using “vi” command; you can use any text editor on Linux or Windows– such as Visual Studio Code or Atom.
vi master/.env.master### WORKSPACE #############################################
TZ=UTC
#MYSQL_DATABASE=master
MYSQL_USER=master
MYSQL_PASSWORD=Master123@
MYSQL_PORT=3306
MYSQL_ROOT_PASSWORD=Mastermaster123Create env dot slave file for slave server.
vi slave/.env.slave### WORKSPACE #############################################
TZ=UTC
#MYSQL_DATABASE=slave
MYSQL_USER=slave
MYSQL_PASSWORD=slave123@
MYSQL_PORT=3306
MYSQL_ROOT_PASSWORD=slaveslave123Below is an explanation for some of the variables contained in the env file to help us understand what role they perform.
Let’s look at the variables and their uses:
TZ is the time zone that will apply to the container.
MYSQL_DATABASE is the name of the database that will be created by itself.
MYSQL_USER is how the use enters into the database we create
MYSQL_PASSWORD is the password of the user that has been created. Creating a strong password is safe.
MYSQL_PORT is the port that runs the MySQL server.
MYSQL_ROOT_PASSWORD is the root user info to access all MySQL databases; create a password made of letters and symbols to be safe.
Create my.cnf file for master database.
[mysqladmin]
user=master
[mysqld]
skip_name_resolve
explicit_defaults_for_timestamp
basedir=/opt/bitnami/mysql
port=3306
tmpdir=/opt/bitnami/mysql/tmp
socket=/opt/bitnami/mysql/tmp/mysql.sock
pid_file=/opt/bitnami/mysql/tmp/mysqld.pid
max_allowed_packet=16M
bind_address=0.0.0.0
log_error=/opt/bitnami/mysql/logs/mysqld.log
character_set_server=utf8
collation_server=utf8_general_ci
plugin_dir=/opt/bitnami/mysql/lib/plugin
server-id=1
binlog_format=ROW
log-bin

[client]
port=3306
socket=/opt/bitnami/mysql/tmp/mysql.sock
default_character_set=UTF8
plugin_dir=/opt/bitnami/mysql/lib/plugin

[manager]
port=3306
socket=/opt/bitnami/mysql/tmp/mysql.sock
pid_file=/opt/bitnami/mysql/tmp/mysqld.pid
!include /opt/bitnami/mysql/conf/bitnami/my_custom.cnf
Make a my.cnf file for slave server as well.
[mysqladmin]
user=master

[mysqld]
skip_name_resolve
explicit_defaults_for_timestamp
basedir=/opt/bitnami/mysql
port=3306
tmpdir=/opt/bitnami/mysql/tmp
socket=/opt/bitnami/mysql/tmp/mysql.sock
pid_file=/opt/bitnami/mysql/tmp/mysqld.pid
max_allowed_packet=16M
bind_address=0.0.0.0
log_error=/opt/bitnami/mysql/logs/mysqld.log
character_set_server=utf8
collation_server=utf8_general_ci
plugin_dir=/opt/bitnami/mysql/lib/plugin
server-id=2
binlog_format=ROW
log-bin

[client]
port=3306
socket=/opt/bitnami/mysql/tmp/mysql.sock
default_character_set=UTF8
plugin_dir=/opt/bitnami/mysql/lib/plugin

[manager]
port=3306
socket=/opt/bitnami/mysql/tmp/mysql.sock
pid_file=/opt/bitnami/mysql/tmp/mysqld.pid
!include /opt/bitnami/mysql/conf/bitnami/my_custom.cnf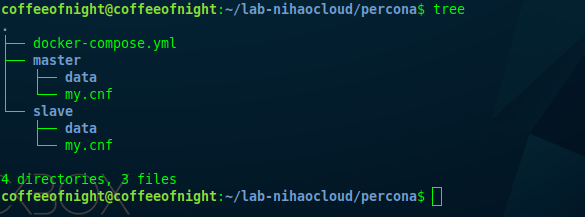
From the picture above, let’s understand the usage of the master and slave folders and their files.
Data folder stores all the data files inside the container in the host.
My.cnf file makes configurations easier on MySQL.
Building a container for MySQL master-slave replication with Docker
Let’s build the MySQL master and slave containers with the docker compose config settings. Make sure you have everything ready to build container using the command “docker-compose up -d”.
docker-compose up -d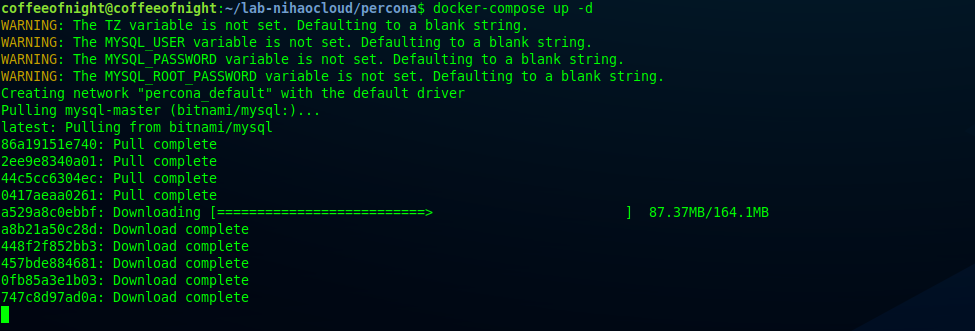
Wait for the process of building the container to be done successfully. After that, check the process with the command “docker-compose ps”.
docker-compose ps
Replication of MySQL master-slave with Docker
Now that the container runs properly, let’s begin the replication process.
Enter the container with “docker-compose exec container bash”. This will configure the replication with the MySQL command.
docker-compose exec mysql-master bash
Let’s login using the root user that we made above on MySQL now.
mysql -u root -p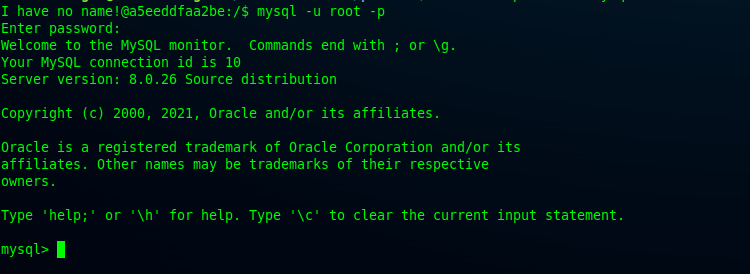
Create a user on MySQL for more replications.
mysql> CREATE USER 'replication'@'%' IDENTIFIED WITH mysql_native_password BY 'Slaverepl123';
Grant user replication access to allow creation for MySQL replications.
mysql> GRANT REPLICATION SLAVE ON *.* TO 'replication'@'%';
Now, we examine if replication executed successfully or not.
mysql> show grants for replication@'%';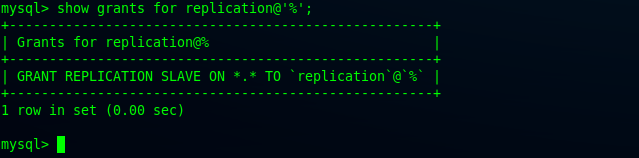
We will know the log status on master from this.
After that, we see the binary log of MySQL master with the following command:
mysql> SHOW MASTER STATUS\G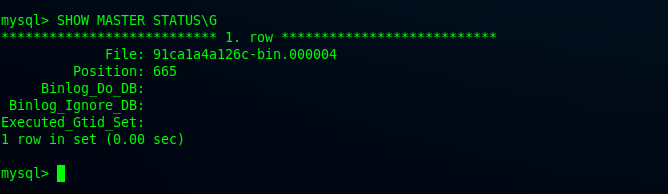
After that, the configuration on the master is complete and we continue to make the configuration on the slave. Login to container using “docker-compose exec” command.
docker-compose exec mysql-slave bash
After that, enter the MySQL slave server to run the following MySQL command.
mysql -u root -p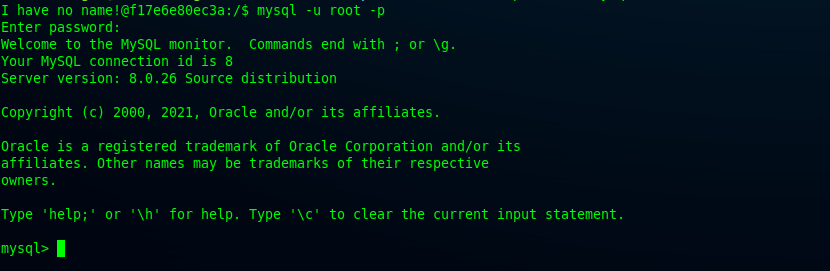
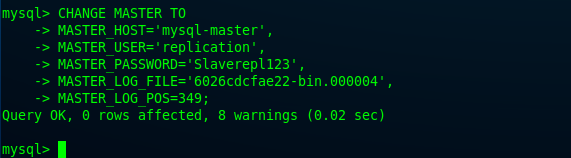
Execute this SQL command to push the MySQl slave part to join the master.
CHANGE MASTER TO
MASTER_HOST='mysql-master',
MASTER_USER='replication',
MASTER_PASSWORD='Slaverepl123',
MASTER_LOG_FILE='87e8982d00d1-bin.000004',
MASTER_LOG_POS=349;
The command to join to master from slave has successfully executed.
Let’s start the slave on mysql.
START SLAVE;
After completion of all steps, recheck your work to ensure nothing was missed. Subsequently, check the status of replication on the slave server.
mysql> SHOW SLAVE STATUS\G
*************************** 1. row ***************************
               Slave_IO_State: Waiting for source to send event
                  Master_Host: mysql-master
                  Master_User: replication
                  Master_Port: 3306
                Connect_Retry: 60
              Master_Log_File: 87e8982d00d1-bin.000005
          Read_Master_Log_Pos: 156
               Relay_Log_File: ba7af6f52d85-relay-bin.000002
                Relay_Log_Pos: 331
        Relay_Master_Log_File: 87e8982d00d1-bin.000005
             Slave_IO_Running: Yes
            Slave_SQL_Running: Yes
              Replicate_Do_DB:
          Replicate_Ignore_DB:
           Replicate_Do_Table:
       Replicate_Ignore_Table:
      Replicate_Wild_Do_Table:
  Replicate_Wild_Ignore_Table:
                   Last_Errno: 0
                   Last_Error:
                 Skip_Counter: 0
          Exec_Master_Log_Pos: 156
              Relay_Log_Space: 547
              Until_Condition: None
               Until_Log_File:
                Until_Log_Pos: 0
           Master_SSL_Allowed: No
           Master_SSL_CA_File:
           Master_SSL_CA_Path:
              Master_SSL_Cert:
            Master_SSL_Cipher:
               Master_SSL_Key:
        Seconds_Behind_Master: 0
Master_SSL_Verify_Server_Cert: No
                Last_IO_Errno: 0
                Last_IO_Error:
               Last_SQL_Errno: 0
               Last_SQL_Error:
  Replicate_Ignore_Server_Ids:
             Master_Server_Id: 1
                  Master_UUID: 5166800b-f068-11eb-abf5-0242ac150002
             Master_Info_File: mysql.slave_master_info
                    SQL_Delay: 0
          SQL_Remaining_Delay: NULL
      Slave_SQL_Running_State: Replica has read all relay log; waiting for more updates
           Master_Retry_Count: 86400
                  Master_Bind:
      Last_IO_Error_Timestamp:
     Last_SQL_Error_Timestamp:
               Master_SSL_Crl:
           Master_SSL_Crlpath:
           Retrieved_Gtid_Set:
            Executed_Gtid_Set:
                Auto_Position: 0
         Replicate_Rewrite_DB:
                 Channel_Name:
           Master_TLS_Version:
       Master_public_key_path:
        Get_master_public_key: 0
            Network_Namespace:
1 row in set, 1 warning (0.01 sec)
Make sure all databases are running smoothly, check on MySQL master.
If the master database is working fine, check on the slave.
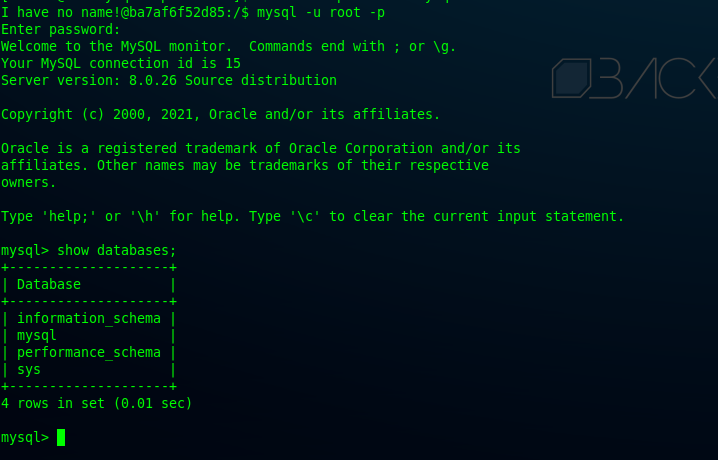
After that, we will test to create a database on the master.
Therefore, let’s create a database to test if replication is working properly.
mysql> create database replicate_db;
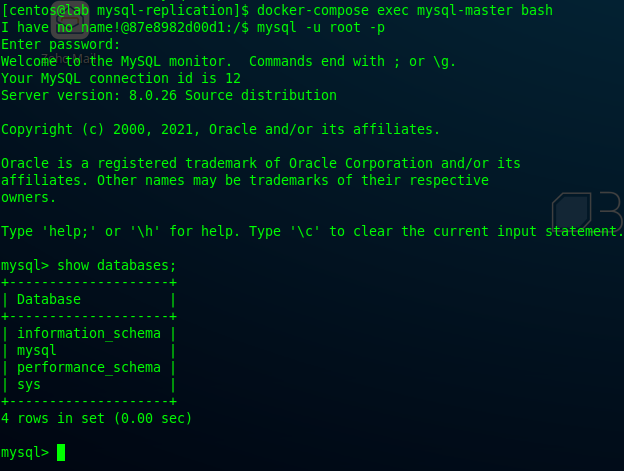
Let’s check on the slave whether the database created on the master can be created automatically on the slave.
mysql> show databases;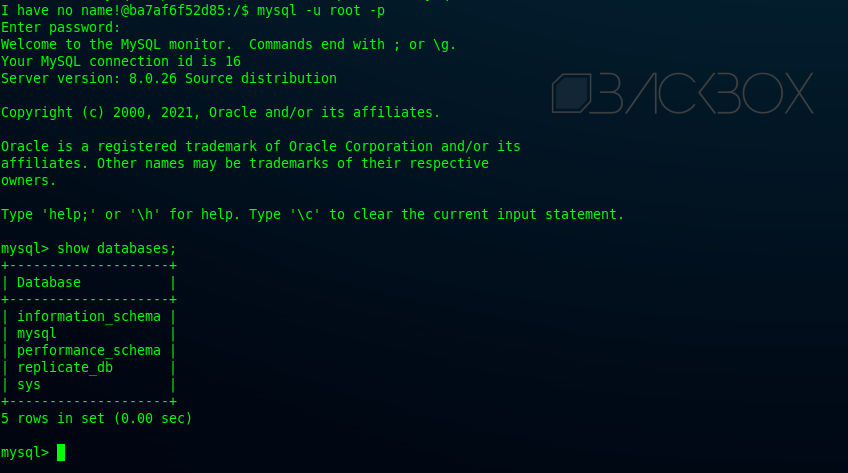
MySQL master slave replication on the docker machine is now successfully set up.
Conclusion
In this post, we have finished configuring MySQL master slave. Master slave on MySQL can be used in production and building applications. However, we must be careful when setting up replication in production. In the case you need to add slave servers, you need to manually configure it. This allows you to horizontally scale the readers. Moreover, you can backup MySQL into file storage; Sesamedisk provides storage for business and personal needs— data encryption and point in time recovery.
Additionally, you can find the docker config on github.
If you like this article, please add our blog to your bookmarks. We have lots of tech articles for you to study and understand. Lastly, I would encourage you to read this post about webrtc jitsi. We also have another post about Highly available MySQL using HAProxy.
Update by: Syed Umar Bukhari on August 26, 2021