How to Host WordPress on Linux System?
Updated on: June 8, 2021
This article will show the step-by-step process to host a WordPress site using a Linux-based system. WordPress is a free and open-source content management system (CMS) written in PHP and paired with a MySQL or MariaDB database. Currently, over 35% of the websites on the web are built with WordPress and it is the top amongst all the CMS providers.
Overview:
Here, we’ve taken the RedHat Linux system running on the AWS cloud. The commands for the installation may change by changing the distro type. We’ve performed the steps manually. However, there are many different approaches to getting access to WordPress and some setup processes are more complex than others.
This tutorial is intended for those who desire to install and administer a WordPress instance on an unmanaged cloud server via the command line backed by AWS managed database provider.

Demonstration:
Now to ensure a clean installation of WordPress, some SQL, and PHP-based dependencies are required. Also, a web server is required where our front-end will actually run. We’ve taken Apache webserver in this demonstration.
Run below commands to ensure dependencies in the system:
yum module install httpd php mysql
yum install php-mysqlnd
systemctl start httpd
systemctl enable httpd
Here, the latest versions of php, mysql and httpd modules are installed fulfilling all the dependencies, and a package named php-mysqlnd is installed for compatibility. Start the webserver services and batter to make the service permanent.
We’re all set to install WordPress in the system. Install the package file from the online source and extract it in the document root of the webserver. In this case, /var/www/html is the doc root of the apache webserver. The following commands are for reference:
wget https://wordpress.org/latest.tar.gz
tar -xzf latest.tar.gz
mv wordpress /var/www/html
Here, the wget command is installing the package from the online source and tar command is extracting that package, and the mv command is coping all the files in the document root of the apache webserver. The document root is the directory from where all publicly accessible pages are delivered.
If all of the above steps are successful then we can access the front-end using the publicly accessible domain name or IP address. But it doesn’t stop just after installation. Still, we’ve to perform some more steps. The front-end is ready. Besides, we need a database to persistently store the data.
After initial installation, the output screen will look like this:
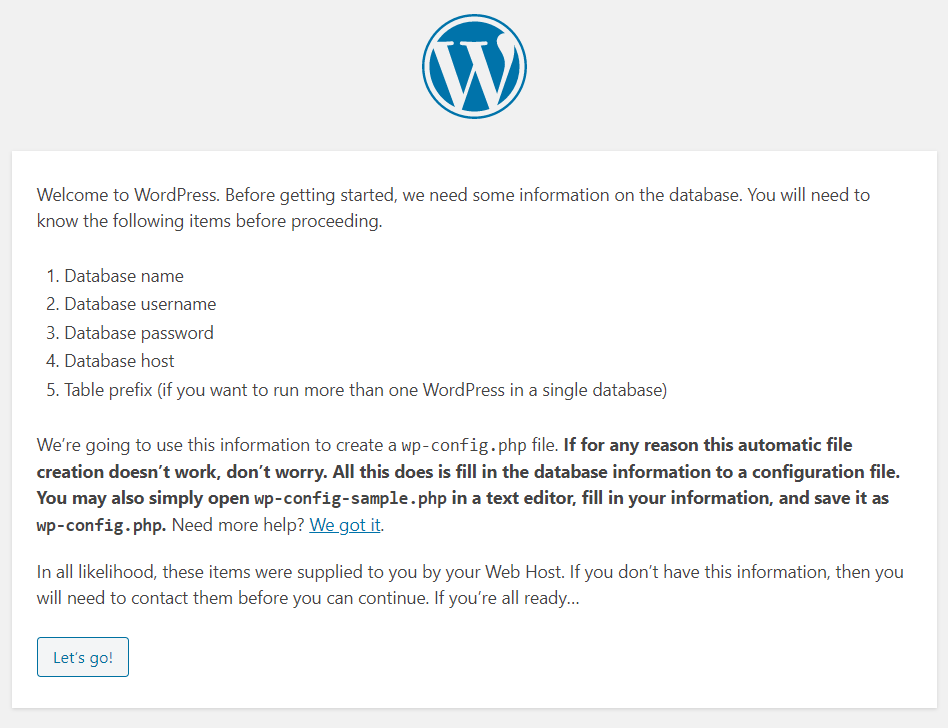
Now pass the database-related arguments as the next step to ensure connectivity between the front and back end of the application. On submit, internally it will communicate with the database and add the details in the local wp-config.php file. Before moving on, lets then create the DB:
AWS RDS Setup:
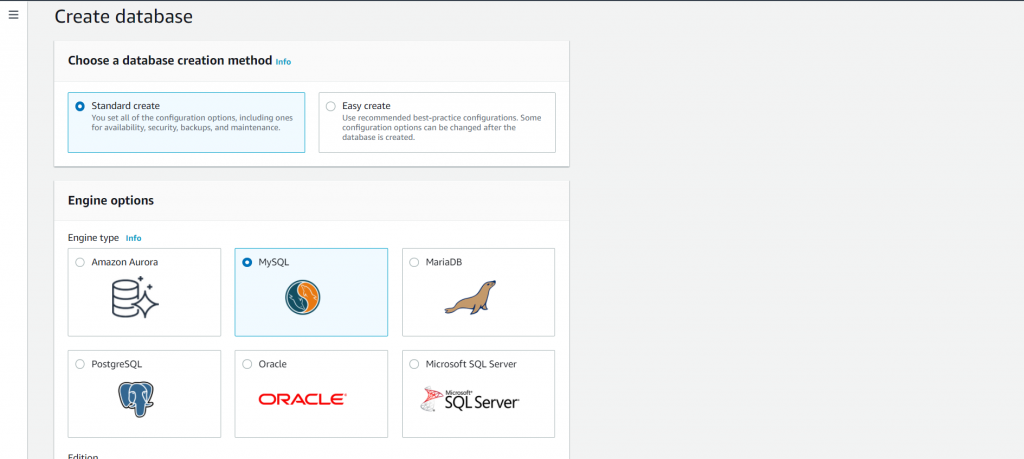
Let’s do the database part. Here, we’ve taken AWS RDS. It is a very powerful relational database service by AWS and fully managed by the provider. Navigate to AWS console and RDS service. This service provides all major SQL-based database flavors with all version compatibility.
As can be seen, select the database installation type and preferred database flavor. We’ve used MYSQL.
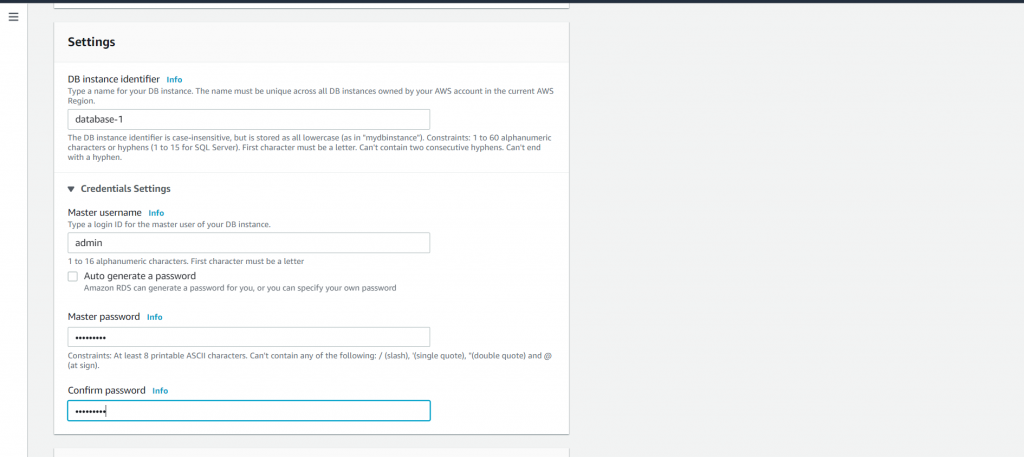
As the next step, pass the admin user credentials for initial login and administration purposes. Surely not suggested working with root privileges all time. Proceed with the “Least privileges” concept and follow best practices.
Likewise, select the type of RDS server and the required storage amount. The instance type consists of the computing unit configuration of the machine and the storage amount will be the actual persistent storage.
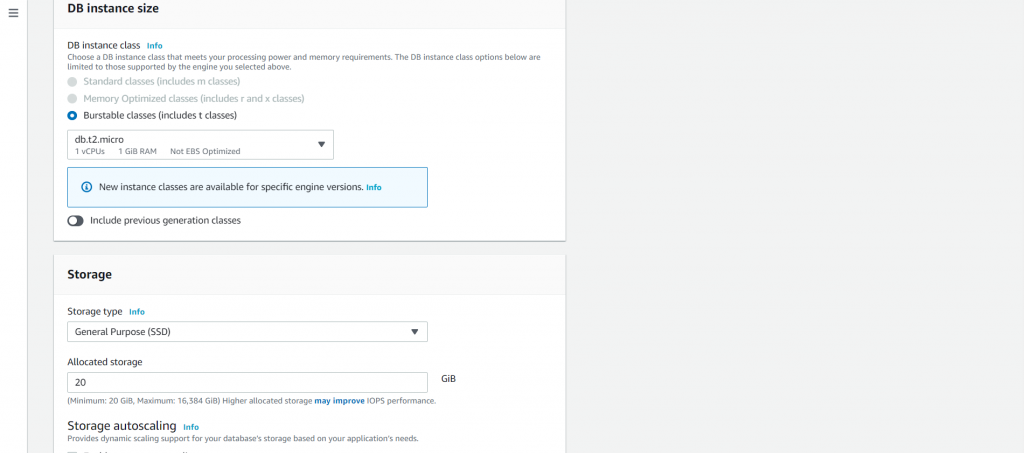
Lastly, select networking configurations next and create a database. As the database is very critical and needs high availability setup with nearly zero downtime, AWS RDS as a fully managed service ensures all the variables and provides database clusters to the end-user. Henceforth it takes around 10-15 mins to spawn the cluster.
Configure Database:
Our database is ready now. In addition, Let’s create a database and tables inside it for connectivity with WordPress instance.
Mysql –h <endpoint of rds> -u username –p password
create database <database name>
CREATE USER ‘wordpressuser’@’%’ IDENTIFIED WITH mysql_native_password BY ‘password’;
GRANT ALL ON wordpress.* TO ‘wordpressuser’@’%’;
Furthermore, log in to the database instance using the credentials and create a database and a database user using the above commands and exit. The database is up and running and we’re good to go. Straightaway head towards the WordPress homepage and pass the above database details and click begin the installation.
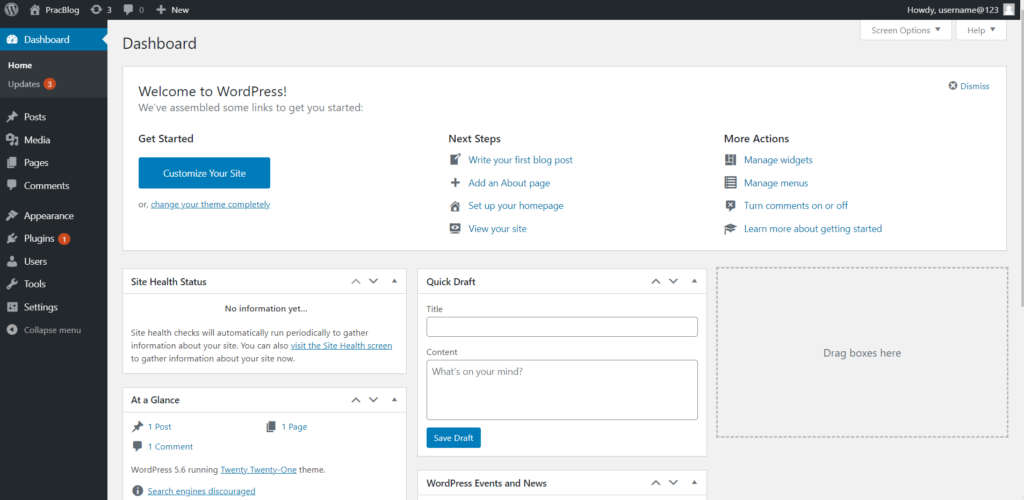
Hence after fulfilling all the steps, we’re now ready to configure the site and make it up and running for the end-user. Eventually, after a clean installation, the wp-admin dashboard will look like the image below:
This is how one can set up and install WordPress on a Linux system and make the site working. Then explore the CMS portal and add powers to your site by adding customized plugins and themes. Now freely post the content and spread it worldwide.
You can also use our very own Cloud Storage system that you can link from your WP so you do not need big servers. Aside from checking out these two posts. Firstly serving regular Content using our cloud. Later, this link recommended lazy loading for big files. By the way, our very own website Sesame Disk is also built with WordPress?.