WordPress (WP) is a free-open-source website creation platform. It is the most popular Content Management System due to its simplicity and effectiveness. Check out our article on how to host WordPress from scratch. However, setting up a new environment every time is a bit tedious and time taking if you need to do it often. In this article, we’ll showWordPress Using Docker-Compose in a container. WP is made using PHP, MySQL and of course JavaScript and HTML.
Why WordPress Using Docker-Compose in a Container?
A container is a standard unit of software that bundles up code and all the dependencies so the application can run in the intended setup. Some of the benefits are, reusability, flexibility, less resource consumption, robustness, isolation. Container tools like Docker, Podman, Rocket are in huge demand and exponentially increasing day by day. Checkout our interesting article on hosting Jitsi on Docker.
So we got an approach to run the same workloads with more efficiency. But the question of setting up the system again and again from scratch remains unsolved.
Docker-compose seems a good option. Basically, Docker compose is a tool for defining and running containers in a unified manner. Specifically, with compose, we can use the YAML file to configure the application service. Use the declarative approach and mirror user-defined requirements and deploy containers with a single simple command.

Demonstration:
Here, we’ve taken Ubuntu Linux as a Docker host and it is running on AWS cloud with root powers. On this host OS, we can run multiple different containers with different OS and packages. Containers are isolated yet use the resources from the host system.
Step 1: Installation of Docker on host system:
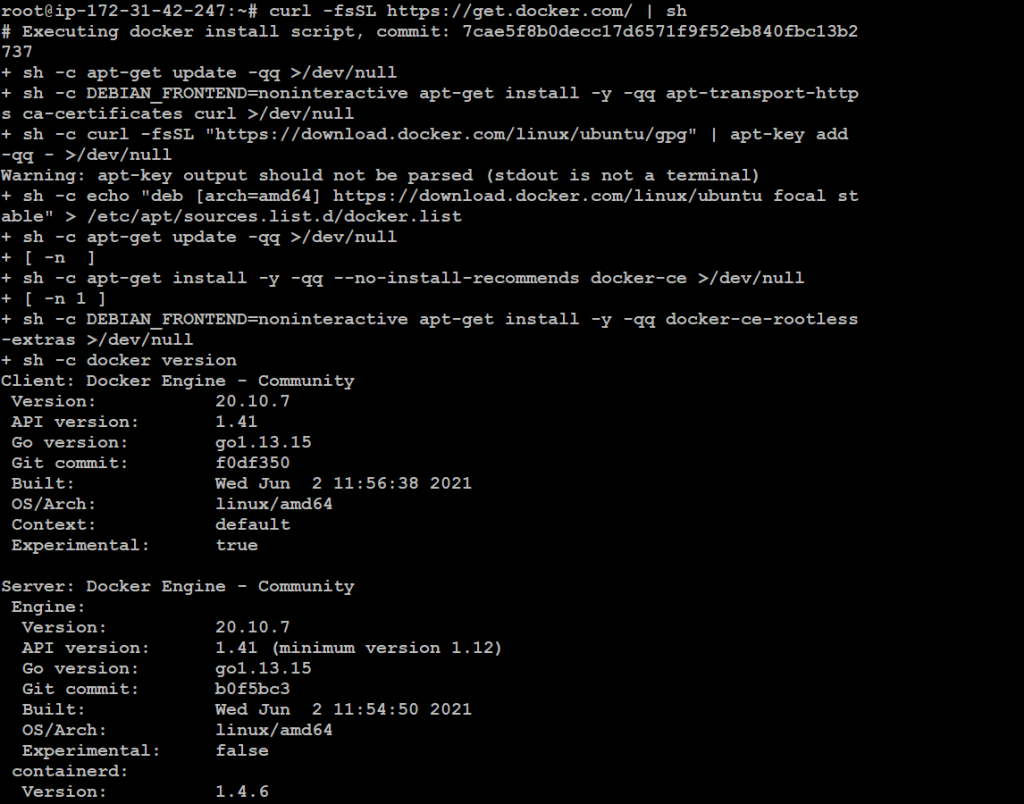
We have to install the Docker package to run the Docker daemon and run compose files. Use the below command for installation:
To update package manage: apt-get update
To install Docker:  curl -fsSL https://get.docker.com/ | sh
To start services: systemctl start docker
There are multiple ways to install Docker.
The systemctl command will start the Docker service, allowing us to utilize container operations such as creating, deleting containers, managing container networks, attaching volume, and many more.
Verify the running service with the systemctl status docker command.
Step:2 : Installation of Docker-compose
After installing and configuring the Docker service, now is the time to set up docker-compose and enable its capabilities. Using compose, we can simply declare the container blueprint and provision containers with the same program file. It gives the benefit of reusability with a simple way of use.
Note: Install curl command-line utility in the system if not present: apt-get install curl) Check out our article on curl for more information.
Install compose using this command: curl -L "https://github.com/docker/compose/releases/download/1.29.2/docker-compose-$(uname -s)-$(uname -m)" -o /usr/local/bin/docker-compose

Alter the execution permissions: chmod +x /usr/local/bin/docker-compose

Verify the compose installation using: docker-compose –v command

Finally, done with the one-time setup of the server. Now we’ve docker service and composer running in the server and are ready to start. Although, we can launch containers without compose. But for large-scale infrastructure, it is recommended to use such an “IaC” approach.
There is a concept of Docker image. Basically, an image is kind of a blueprint or base of a container. It is the essential unit to launch a container. We store and maintain these images in repositories. Docker hub is a public repository for docker images. We can find frequently used and custom-created docker images here.
Here, we’ve taken readily available images for WordPress (WP) and MariaDB. We’ve used MariaDB as a database to persistently store the content of the website. Using composer, we’ll link both the front-end and backend and create a working website.
Step 3: Creating composer file for WP
mkdir wordpress
cd wordpress
vim docker-compose.yml
Naming the composer file as above is a standard convention. Alternatively, we can explicitly pass the compose filename with the -f flag. Good practice to implement compose files in separate directories. Indentation is compulsory in YAML
wordpress:
  image: wordpress
  links:
    - mariadb:mysql
  environment:
    - WORDPRESS_DB_PASSWORD = your password
    - WORDPRESS_DB_USER= root
    - WORDPRESS_DB_NAME= db name
  ports: '-8081:80'
mariadb:
  image: mariadb
  environment:
    - MYSQL_ROOT_PASSWORD = your password
    - MYSQL_DATABASE = db name
Here, we have declared two containers named WordPress and MySQL in the flavor of MariaDB respectively. The image tag refers to the base image for containers. WordPress and MariaDB are the image names. The links tag implicitly represents the link of the mentioned container. The environment keyword is used to pass environmental variables (also known as env vars in OS development jargon) while launching the container to fulfil the dependencies. The ports keyword is used to expose the container to the outer world. Here we’ve taken post 8081 of host os and bind to port 80 of the WordPress Using Docker Compose. So any client coming to port 8081 will be redirected to container port 80. In addition, make sure the password in the environmental variable is correct in both containers.
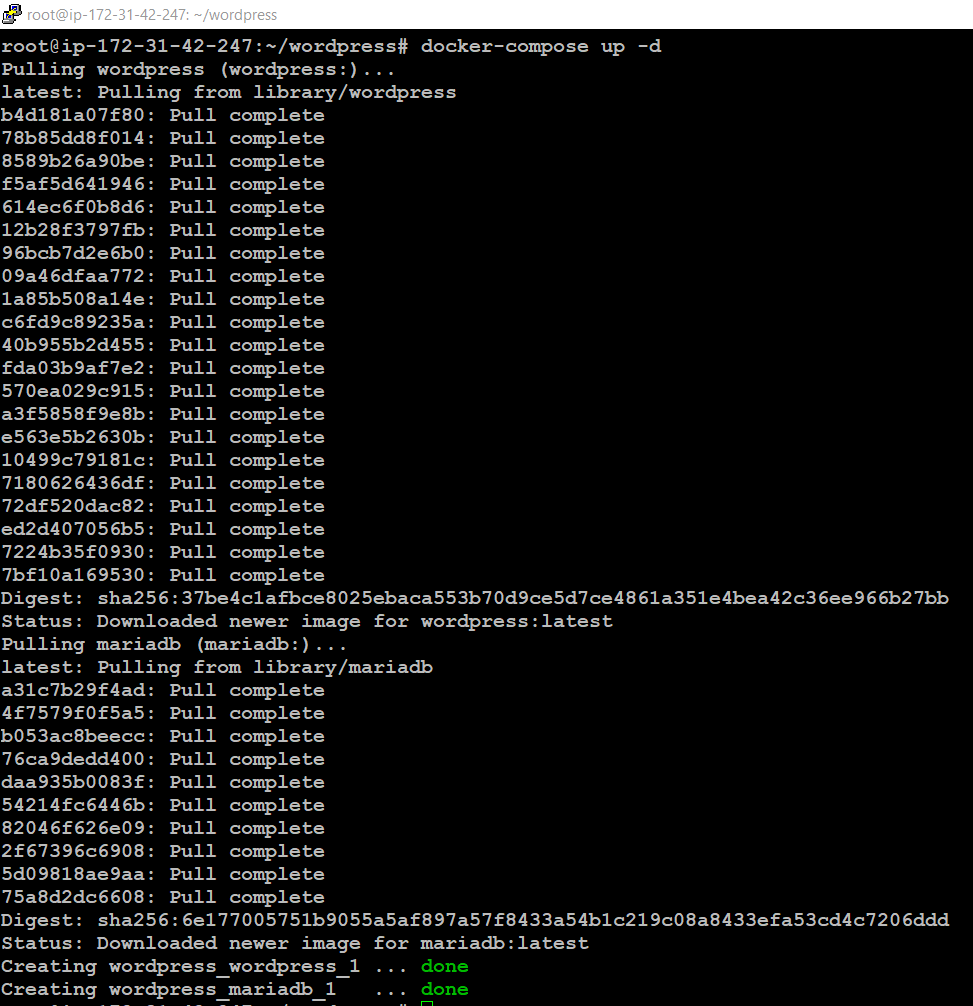
Now the composer file is ready. Create the whole setup with the command below:
Docker-compose up –d
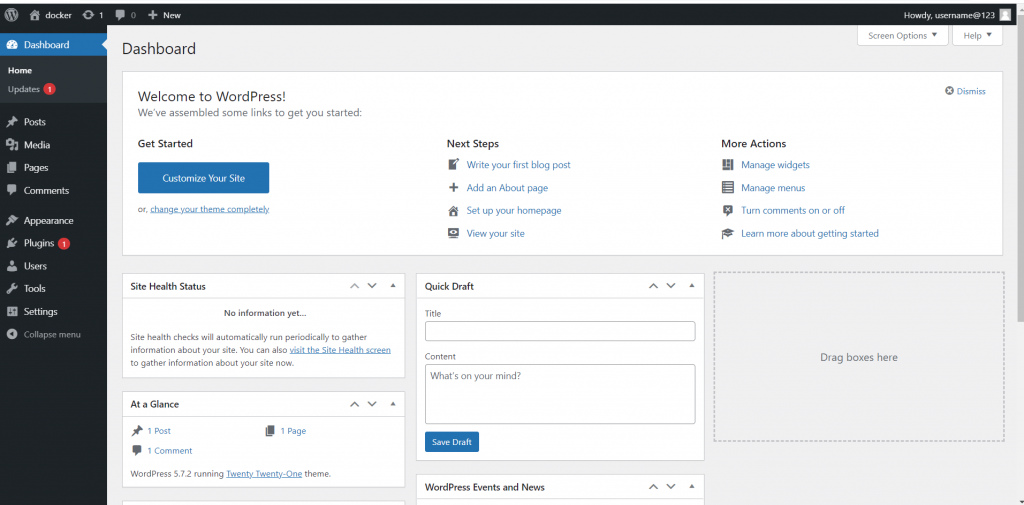
The process is successful if the above command doesn’t return any error. Cross-check the same by hitting the site at public_ip:8081. Complete the installation process and the end page would look like this:

Hence, the installation is done and linked with the backend database. This is how containers help to provision lightweight os. And compose makes it even more feasible by bundling multiple tasks in a file. That is WordPress Using Docker Compose. Thanks for reading.!


