Load Balance MySQL Using HAProxy
Load Balance HA MySQL with HAProxy.
HAProxy or High Availability Proxy is a high performance open-source load balancer created to work (load balance) over TCP/HTTP. This is a Software that has several use cases you can chose, but it’s great for a MySQL load balancer. The company who makes HAProxy also develops many more products paid and free. Now for this lab we will use the community version as load balancer software on our servers. The key theme for this post will be HAProxy Docker to Load Balance MySQL. In other words a lab of HAProxy, Docker and MySQL.
In general Load Balancers power the uptime of organizations with large infrastructures and enormous traffic demands by giving them the flexibility and confidence to deliver websites and applications with high availability, performance and security at any scale in any environment. Many companies use load balancers in their product delivery process. You can check this article to configure a Master-Slave on MySQL.
In this post, we will create a master replication master on MySQL and make MySQL load balancer replication with HAProxy. Load balance is useful if we want to create a reliable database with multiple MySQL services on multiple instances or servers. For this purpose, I have used docker to create a load balance with HAProxy and MySQL. However, you can also deploy it on an AWS instance or server without running docker.
Okay, let’s get started with creating a Master-Master replication with load balance on HAProxy using MySQL.
Note: I am using Ubuntu Server 18.04 LTS when creating this article.
How To Load Balance with MySQL: Editing The Docker-Compose yml File
If we create MySQL replication with HAProxy load balancer to load Balance using docker containers. The easiest way or you could even say best way for a lab is to make it is to use Docker Compose. This way you configure docker to create multiple containers using a dot yml (yaml) configuration file.
Docker compose helps us in managing containers in docker. You can edit the configuration in docker compose file. Let’s create docker compose files for MySQL and HAProxy containers by following the steps below.
version: '3.9'
services:
  mysql-master1:
    image: mysql:8.0
    container_name: mysql-master1
    restart: unless-stopped
    env_file: master1/.env
    command: --default-authentication-plugin=mysql_native_password
    cap_add:
      - all
    volumes:
      - ./master1/my.cnf:/etc/mysql/my.cnf
      - ./master1/data:/var/lib/mysql
    environment:
      - TZ:${TZ}
      - MYSQL_USER:${MYSQL_USER}
      - MYSQL_PASSWORD:${MYSQL_PASSWORD}
      - MYSQL_ROOT_PASSWORD:${MYSQL_PASSWORD}
    networks:
      default:
        aliases:
          - mysql

  mysql-master2:
    image: mysql:8.0
    container_name: mysql-master2
    restart: unless-stopped
    command: --default-authentication-plugin=mysql_native_password
    env_file: master2/.env
    cap_add:
      - all
    volumes:
      - ./master2/my.cnf:/etc/mysql/my.cnf
      - ./master2/data:/var/lib/mysql
    environment:
      - TZ:${TZ}
      - MYSQL_USER:${MYSQL_USER}
      - MYSQL_PASSWORD:${MYSQL_PASSWORD}
      - MYSQL_ROOT_PASSWORD:${MYSQL_PASSWORD}
    networks:
      default:
        aliases:
          - mysql

  haproxy:
    image: haproxytech/haproxy-ubuntu:latest
    container_name: haproxy
    restart: unless-stopped
    ports:
      - "2999:2999"
    cap_add:
      - all
    volumes:
      - ./haproxy.cfg:/etc/haproxy/haproxy.cfg
    networks:
      default:
        aliases:
          - mysql
Creating MySQL Master 1 Config for Load Balance with MySQL
I have used the latest version of MySQL to create a Master-Master MySQL-Replication on server 1. To make it easier to install MySQL, I used docker and created a persistent volume to allow the data in the container to be stored on the host server.
Additionally, create a persistent volume for my.cnf to connect to the container. Create a master1 folder to store data on MySQL replication on Master 1.
ubuntu@haproxy: mkdir /data/haproxy-mysql/master1
Create a data folder in the Master 1 directory; this data folder is useful for storing persistent volumes from the MySQL master 1 container to the host server.
ubuntu@haproxy: mkdir /data/haproxy-mysql/master1/data
Moreover, we need a custom configuration file in my.cnf on the host server that will create a persistent volume on the container.
ubuntu@haproxy: touch /data/haproxy-mysql/master1/my.cnf
After that, open the my.cnf file and add configuration to my.cnf file to do replication on MySQL Master 1.
# Copyright (c) 2017, Oracle and/or its affiliates. All rights reserved.
#
# This program is free software; you can redistribute it and/or modify
# it under the terms of the GNU General Public License as published by
# the Free Software Foundation; version 2 of the License.
#
# This program is distributed in the hope that it will be useful,
# but WITHOUT ANY WARRANTY; without even the implied warranty of
# MERCHANTABILITY or FITNESS FOR A PARTICULAR PURPOSE.  See the
# GNU General Public License for more details.
#
# You should have received a copy of the GNU General Public License
# along with this program; if not, write to the Free Software
# Foundation, Inc., 51 Franklin St, Fifth Floor, Boston, MA  02110-1301 USA

#
# The MySQL  Server configuration file.
#
# For explanations see
# http://dev.mysql.com/doc/mysql/en/server-system-variables.html

[mysqld]
pid-file        = /var/run/mysqld/mysqld.pid
socket          = /var/run/mysqld/mysqld.sock
datadir         = /var/lib/mysql
secure-file-priv= NULL
server-id=1
binlog_format=ROW
log-bin
skip-name-resolve
# Custom config should go here
!includedir /etc/mysql/conf.d/
Then, create an environment variable (env) file to store the environment username and password in MySQL. As such, this lasts for the duration of terminal.
ubuntu@haproxy:~$ touch /data/haproxy-mysql/master2/.env
Moreover, fill the env file on Master 1 like this:
### WORKSPACE #############################################
TZ=UTC
#MYSQL_DATABASE=master
MYSQL_USER=master
MYSQL_PASSWORD=Master123@
MYSQL_PORT=3306
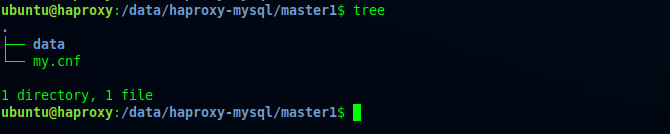
MYSQL_ROOT_PASSWORD=Mastermaster123The following is a tree view in the Master 1 directory for MySQL master1 replication.
Create Master 2 MySQL Config File
Since we have made the configuration on mysql master 1, let’s make the configuration on MySQl Master 2 now.
To do this, create a Master 1 folder with this command:
ubuntu@haproxy:~$ mkdir /data/haproxy-mysql/master2
In addition, create a data folder in the Master 2 directory to create a persistent volume on mysql master2.
ubuntu@haproxy:~$ mkdir /data/haproxy-mysql/master2/data
Therefore, don’t forget to create my.cnf file for MySQL Master 2 replication configuration.
ubuntu@haproxy:~$ touch /data/haproxy-mysql/master2/my.cnf
Add the contents of the my.cnf configuration as below.
# Copyright (c) 2017, Oracle and/or its affiliates. All rights reserved.
#
# This program is free software; you can redistribute it and/or modify
# it under the terms of the GNU General Public License as published by
# the Free Software Foundation; version 2 of the License.
#
# This program is distributed in the hope that it will be useful,
# but WITHOUT ANY WARRANTY; without even the implied warranty of
# MERCHANTABILITY or FITNESS FOR A PARTICULAR PURPOSE.  See the
# GNU General Public License for more details.
#
# You should have received a copy of the GNU General Public License
# along with this program; if not, write to the Free Software
# Foundation, Inc., 51 Franklin St, Fifth Floor, Boston, MA  02110-1301 USA

#
# The MySQL  Server configuration file.
#
# For explanations see
# http://dev.mysql.com/doc/mysql/en/server-system-variables.html

[mysqld]
pid-file        = /var/run/mysqld/mysqld.pid
socket          = /var/run/mysqld/mysqld.sock
datadir         = /var/lib/mysql
secure-file-priv= NULL
server-id=2
binlog_format=ROW
log-bin
skip-name-resolve
# Custom config should go here
!includedir /etc/mysql/conf.d/
In addition, create env file for MySQL Master 2.
ubuntu@haproxy:~$ touch /data/haproxy-mysql/master2/.env
Let’s fill in the environment username and password in the env file master2.
### WORKSPACE #############################################
TZ=UTC
#MYSQL_DATABASE=master
MYSQL_USER=master
MYSQL_PASSWORD=Master123@
MYSQL_PORT=3306
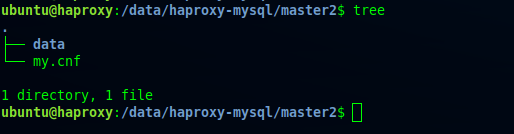
MYSQL_ROOT_PASSWORD=Mastermaster123Congratulations! You have created the replication configuration on MySQL Master 2. You can verify by using the tree:
Make Build Up Container for Load Balance on MySQL
Before you make docker-compose, change the permissions of the Master 1 and Master 2 folders according to the user on your server first with chown.
ubuntu@haproxy:/data/haproxy-mysql$ sudo chown -R $(whoami): master*
Not only that, but also change the data access rights so that it can be read by the container with this command (like the problems in Stack Overflow).
ubuntu@haproxy:/data/haproxy-mysql$ chmod -R a+rwx master1/data/
ubuntu@haproxy:/data/haproxy-mysql$ chmod -R a+rwx master2/data/
We have made all the configurations of docker compose and the mysql folder structure, let’s build using docker compose. We go to the haproxy-mysql directory then run the command “docker-compose up -d”.
ubuntu@haproxy:/data/haproxy-mysql$ docker-compose up -d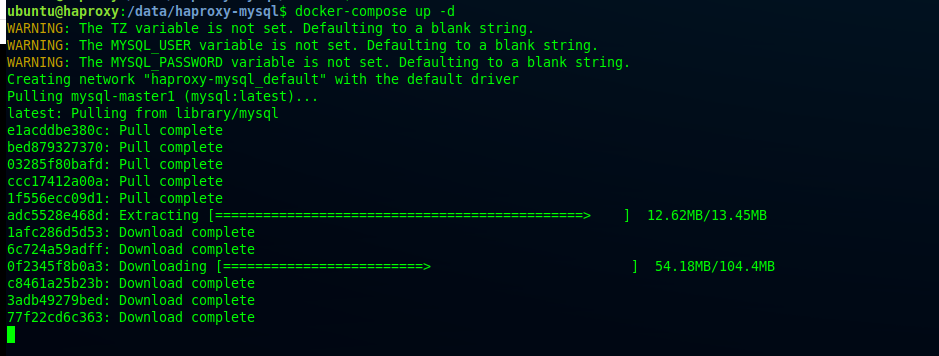
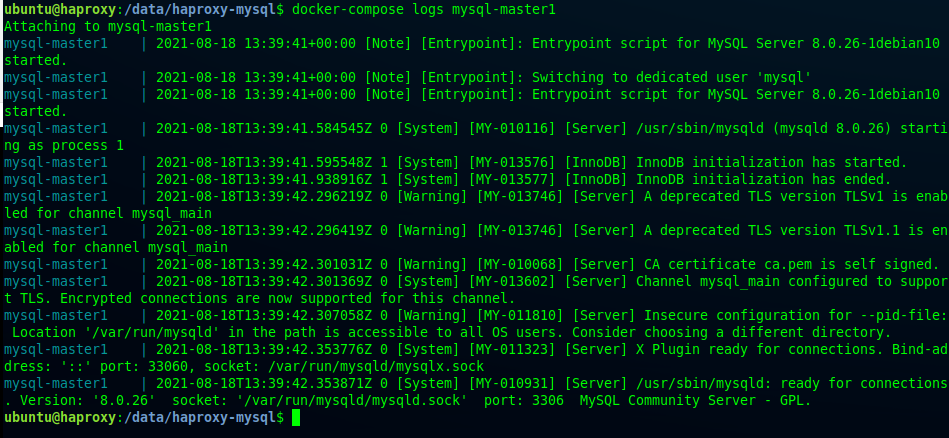
Let’s see the service container can run properly with the command “docker-compose ps”.
ubuntu@haproxy:/data/haproxy-mysql$ docker-compose ps
The container is running fine, then we need to make a replication configuration on mysql. We will make a master master replication first before heading to loadbalance with haproxy.
Create Replications on MySQL
This is where you will enter the configuration stage in MySQL. Enter the MySQL Master 1 container to create the haproxy_user user. Then, enter the MySQL container with the root user and password that you added to the master1/.env file.
ubuntu@haproxy:/data/haproxy-mysql$ docker-compose exec mysql-master1 bash
In this step you will create the user haproxy_user on mysql master1 by logging in using the root user firstL
mysql -u root -p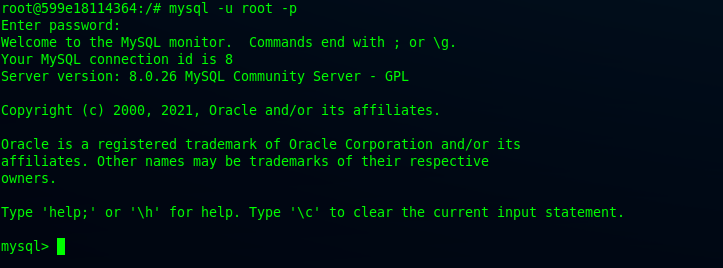
Hence, create a new user “replication” on Master 1 MySQL
CREATE USER 'replication'@'%' IDENTIFIED WITH mysql_native_password BY 'Slaverepl123';
Let’s allow user replication so that you can use it as replication in MySQL.
mysql> GRANT REPLICATION SLAVE ON *.* to 'replication'@'%';
After creating slave on MySQL master1, check master slave status on MySQL Master 1.
mysql> SHOW MASTER STATUS;
Then, go to MySQL Master 2 to create user replications and allow master master replications. Similarly, enter into the mysql-master2 container now.
ubuntu@haproxy:/data/haproxy-mysql$ docker-compose exec mysql-master2 bashSubsequently, login to the root user on MySQL Master 2.
root@a46ab42e4e7c:/# mysql -u root -p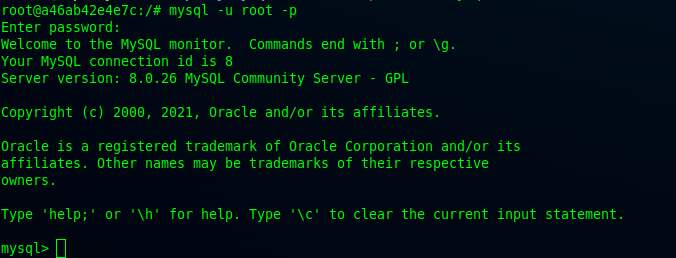
Create user replications on master2 mysql.
mysql> CREATE USER 'replication'@'%' IDENTIFIED WITH mysql_native_password BY 'Slaverepl123';
After that, grant replication slave on Master2 MySQL with user MySQL.
mysql> GRANT REPLICATION SLAVE ON *.* to 'replication'@'%';
Congratulations! You have created user replications and granted replication slaves on MySQL Master 2. To confirm, let’s see the status of the master.
mysql> SHOW MASTER STATUS;
Now, stop the slave on MySQL Master 1.
mysql> STOP SLAVE;
Accessing The Slave Logs on Master 1
You can access the initial bin log and slave position on MySQ with master slave log on MySQL Master 1.
mysql> CHANGE MASTER TO MASTER_HOST = 'mysql-master1', MASTER_USER = 'replication', MASTER_PASSWORD = 'Slaverepl123', MASTER_LOG_FILE = '6e360f05f522-bin.000001', MASTER_LOG_POS = 673;
Then, start the slave on MySQL Master 1.
mysql> START SLAVE;After doing that, check the status of the slave on MySQL Master 1.
mysql> SHOW SLAVE STATUS \G;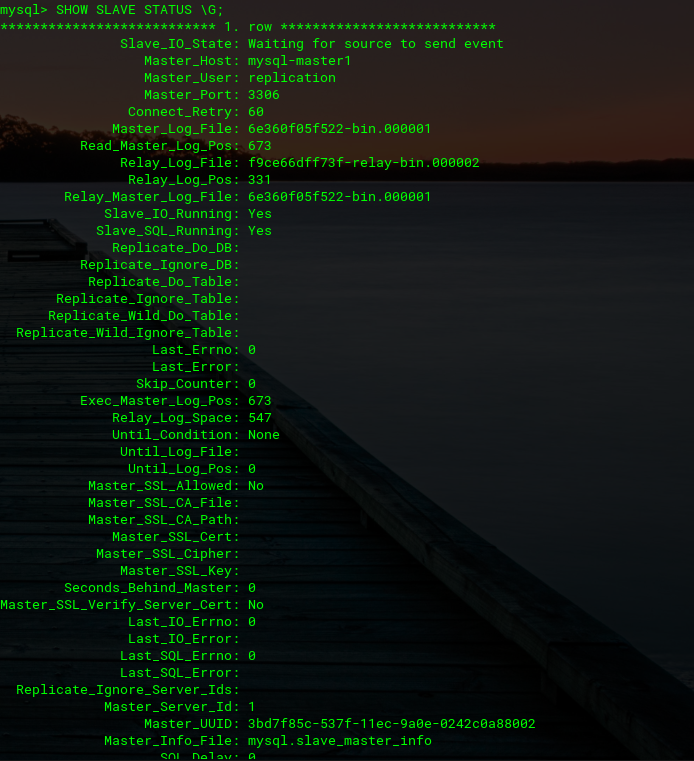
Accessing The Slave Logs on Master 2
You can access the initial bin log and slave positions on MySQL 1 with master slave log on MySQL Master 2.
mysql> CHANGE MASTER TO MASTER_HOST = 'mysql-master2', MASTER_USER = 'replication', MASTER_PASSWORD = 'Slaverepl123', MASTER_LOG_FILE = 'f9ce66dff73f-bin.000001', MASTER_LOG_POS = 673;
In addition, start slave on MySQL Master 1.
mysql> START SLAVE;You can examine the slave status on MySQL Master 1 now.
mysql> SHOW SLAVE STATUS \G;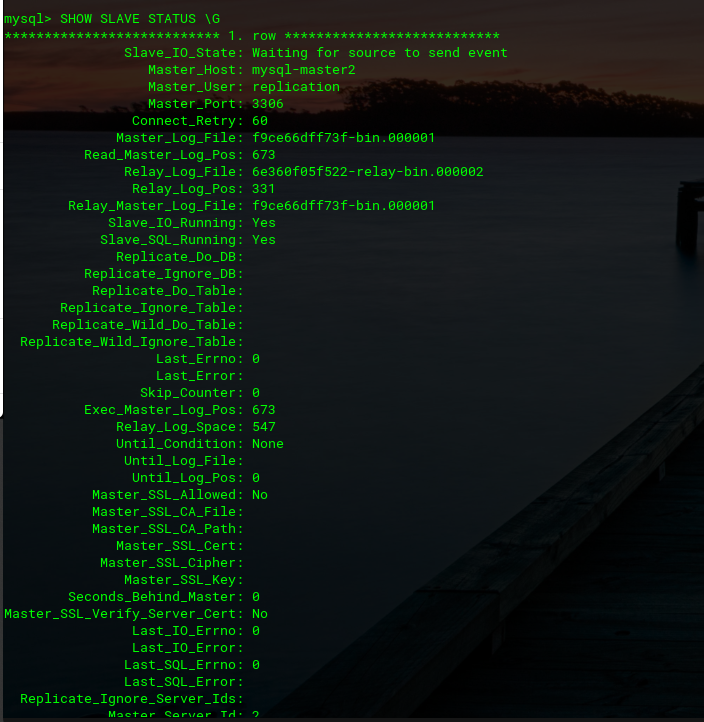
Likewise, now you can stop the slave on MySQL Master 2.

Creating The HAProxy User for HAProxy docker container to use.
With this step you will get to create the user haproxy_user on Master 1.
mysql> CREATE USER 'haproxy_user'@'%';
Likewise, create a user haproxy_root– where only haproxy instances will be able to use the haproxy_root user.
mysql> CREATE USER 'haproxy_root'@'%' IDENTIFIED WITH mysql_native_password BY 'Haproxymysql123';
To confirm this step, write a query to fetch the users list in MySQL Master 1 which will be synchronized to MySQL Master 2.
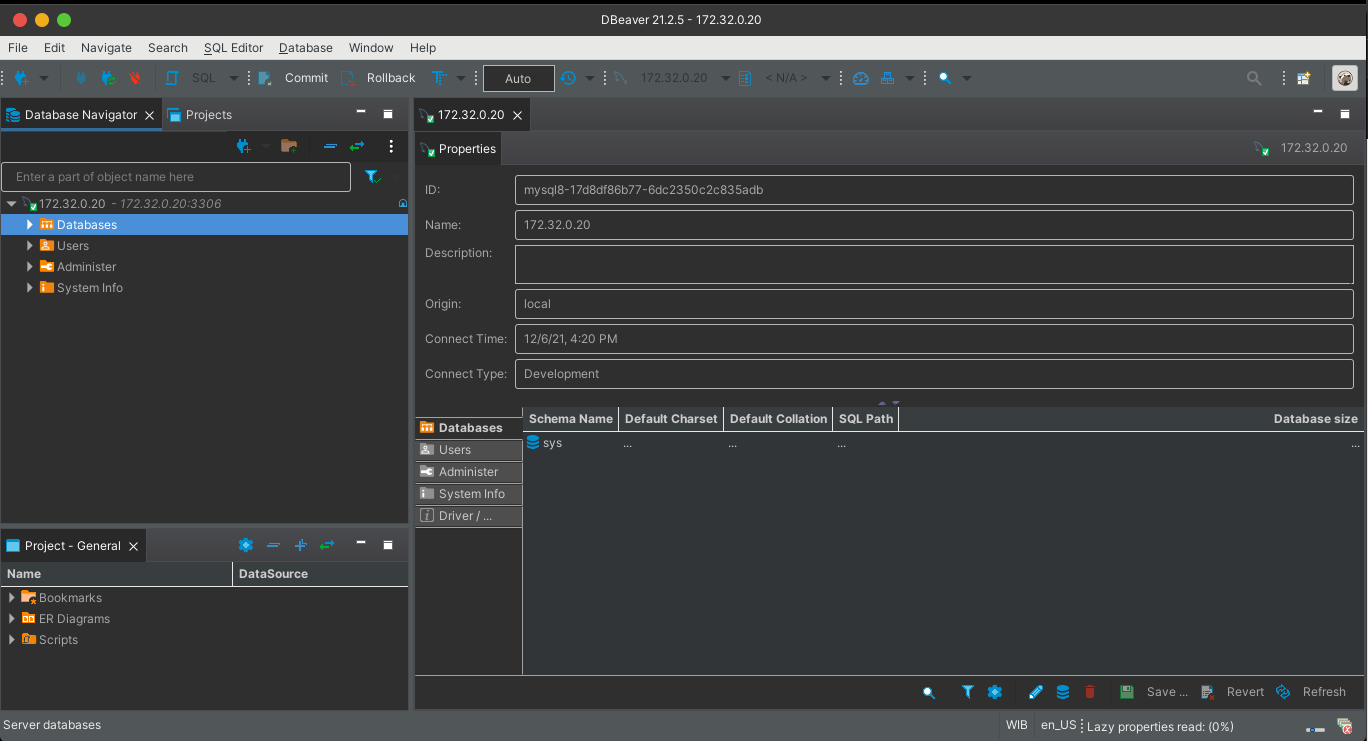
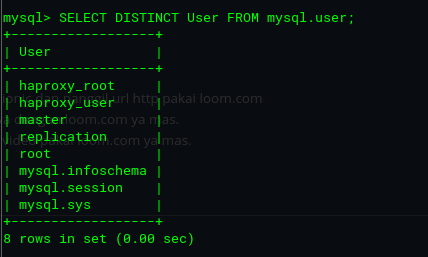
mysql> SELECT DISTINCT User FROM mysql.user;Here’s how the output looks on MySQL Master 1.
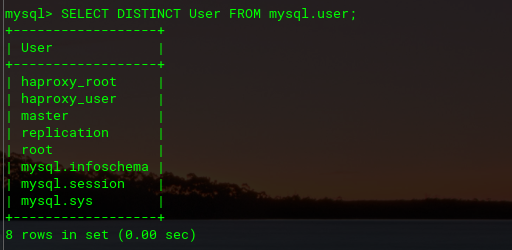
Similarly, this is the output on MySQL Master 2.
HAProxy MySQL; Configure The HAProxy to Load Balance
How cool is that? You have successfully created a MySQL replication with Master-Master for your haproxy mysql setup.
Therefore, the logical next step is to configure haproxy to make MySQL Loadbalance with TCO.
To do this, you will have to enter the haproxy container.
ubuntu@haproxy:/data/haproxy-mysql$ docker-compose exec haproxy bash
Great! With that done, let’s start configuring loadbalance on haproxy.
Firstly, open haproxy configuration path at /etc/haproxy/haproxy.cfg.
root@016fbb5028ee:/# vi /etc/haproxy/haproxy.cfg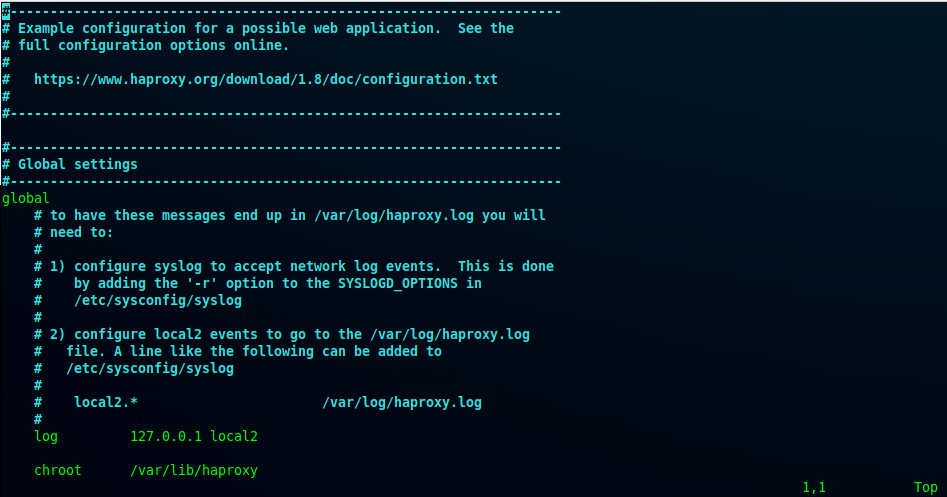
Then, add the configuration to the path /etc/haproxy/haproxy.cfg shown below. This will be used by the HAProxy docker container.
#---------------------------------------------------------------------
# Example configuration for a possible web application.  See the
# full configuration options online.
#
#   https://www.haproxy.org/download/1.8/doc/configuration.txt
#
#---------------------------------------------------------------------

#---------------------------------------------------------------------
# Global settings
#---------------------------------------------------------------------
global
    # to have these messages end up in /var/log/haproxy.log you will
    # need to:
    #
    # 1) configure syslog to accept network log events.  This is done
    #    by adding the '-r' option to the SYSLOGD_OPTIONS in
    #    /etc/sysconfig/syslog
    #
    # 2) configure local2 events to go to the /var/log/haproxy.log
    #   file. A line like the following can be added to
    #   /etc/sysconfig/syslog
    #
    #    local2.*                       /var/log/haproxy.log
    #
    log         127.0.0.1 local2

    chroot      /var/lib/haproxy
    pidfile     /var/run/haproxy.pid
    maxconn     4000
    user        haproxy
    group       haproxy
    daemon

    # turn on stats unix socket
    stats socket /var/lib/haproxy/stats

    # utilize system-wide crypto-policies
    ssl-default-bind-ciphers PROFILE=SYSTEM
    ssl-default-server-ciphers PROFILE=SYSTEM

#---------------------------------------------------------------------
# common defaults that all the 'listen' and 'backend' sections will
# use if not designated in their block
#---------------------------------------------------------------------
defaults
    #mode                    http
    log                     global
    option                  tcplog
    retries                 2
    timeout connect         4s
    timeout client          30m #1440m
    timeout server          30m #1440m
    timeout check           10s
    #maxconn                 3000

listen stats
    mode		http
    bind		*:2999
    stats		enable
    stats		uri /stats
    stats	realm	Strictly\ Private
    stats	auth	devops:Haproxymysql2021@

listen mysql-cluster
    mode 	tcp
    option	tcpka
    bind		*:3306
    option	mysql-check	user	haproxy_user
    balance	roundrobin
    server	master1		mysql-master1:3306	check
    server	master2		mysql-master2:3306	check
Here, it is crucial to validate the haproxy configuration with this command below:
root@016fbb5028ee:/# haproxy -c -V -f /etc/haproxy/haproxy.cfg
After confirming that the haproxy configuration is valid, restart the haproxy container so that the TCP Loadbalance on port 3306 can run on haproxy.
ubuntu@haproxy:/data/haproxy-mysql$ docker-compose restart haproxy
After restarting, check if port 3306 is running on the haproxy container.
root@016fbb5028ee:/# netstat -ntlp
In the same way, try to test with the MySQL client– to test it we need to install MySQL client on haproxy.
root@016fbb5028ee:/# apt update && apt install mysql-client -y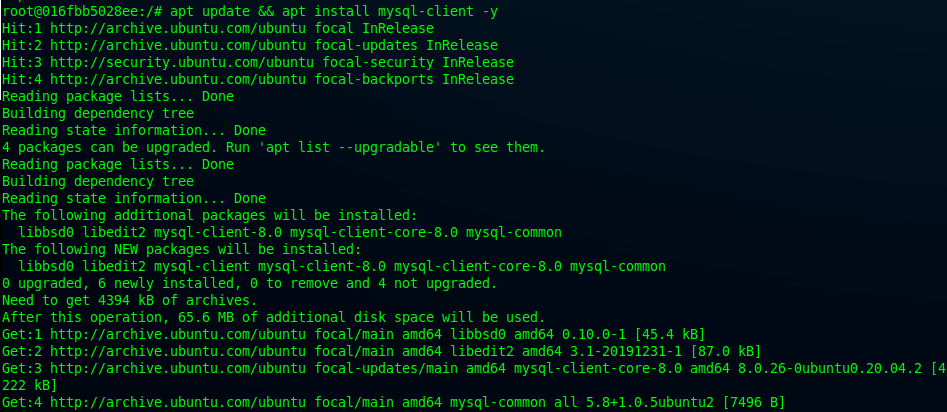
In the end, check for the server_id using this command:
root@8e949cb0bda6:/# mysql -u root -p -h 127.0.0.1 -e "show variables like 'server_id'";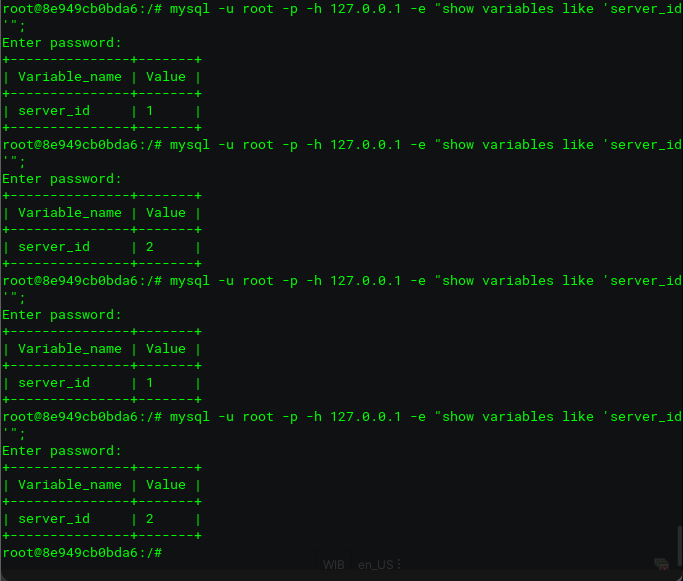
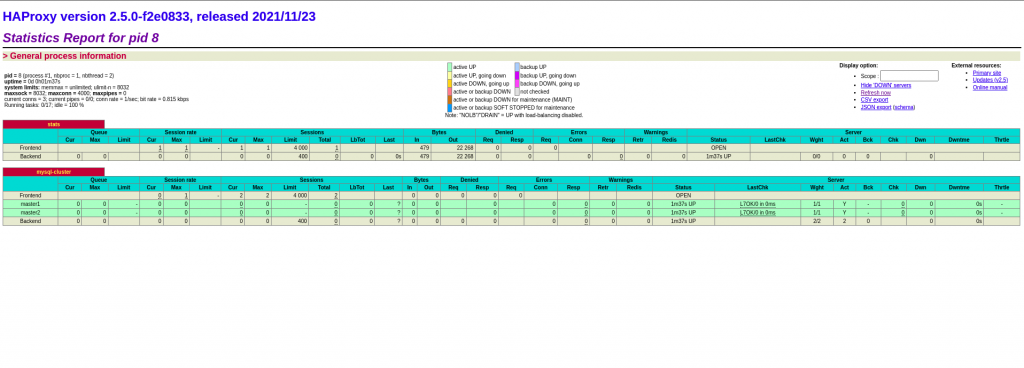
Note: You can also check HAProxy docker container stats on the browser using Server IP.
Conclusion
In conclusion, it is safe to say HAProxy is quite useful for HTTP and TCP Loadbalancers. This way we can use it for TCP loadbalance on MySQL with Master-Master replication on MySQL. Besides being useful for simplifying the development process, you can also make MySQL work powerfully. I hope you liked this post and were able to follow along.
Finally feel free to check out the HAProxy Load balance using MySQL code on github.
Edited by: Syed Umar Bukhari