Nextcloud Docker: Private Cloud Storage on your Server
Nextcloud is a free cloud storage service you can build on your private server with Docker. Nextcloud, like Sesame Disk by Nihao Cloud, lets you collaborate with open office, sync files and share with your friend or colleague, among various options. Moreover it’s free and open source, but you can also buy enterprise offers with more features.
A key advantage of using free and open source cloud storage like Nextcloud is that it offers you complete control and freedom that you won’t find in many cloud storage services. Moreover, it’s like your own “private” cloud storage service.
But on the contrary, it’s going to be on you if it falls or if there are any problems that need resolving.
Benefit of Using Nextcloud: Cloud Storage with Docker
One of the easier and beneficial ways is to use Nextcloud by installing the cloud storage on your private server with Docker. This is suitable for schools, companies, and the government. Why? The agency wants to create personal cloud storage to keep its data from being publicly accessed. Enterprise support also helps with a problem on your server or Nextcloud cloud storage product.
Nextcloud can also integrate with Microsoft Outlook and a whole range of options. This is good if you use Microsoft Outlook for your emails.
In addition, you can also sync Nextcloud on several applications like Mozilla thunderbird. Also, you can sync calendars and contacts and share the file links with your friend and coworkers.
Requirements to Install Nextcloud Cloud Storage with Docker
These are the resources I used for this post– but you can use any configuration that works. Remember that there are several other ways to follow this tutorial. For all intents and purposes, you can install Nextcloud on any OS as long as you have Docker.
- Ubuntu 20.04
- Docker
- Docker-compose
- A domain to access cloud storage if you want public access
Install Docker on Ubuntu 20.04
In this step, I will install Docker on ubuntu 20.04, prepared to deploy Nextcloud. I will install Docker using bash shell. But first, you need to install curl.
root@ubuntu-sgp-busan:~# apt update && apt install curl -yAfter installing curl, download the bash shell to install Docker.
root@ubuntu-sgp-busan:~# curl -fsSL https://get.docker.com -o get-docker.shNext, change the get-docker.sh permissions to be system readable, and then run the bash shell get-docker.sh.
root@ubuntu-sgp-busan:~# chmod +x get-docker.shAfter that, the bash shell get-docker.sh is ready for to run:
root@ubuntu-sgp-busan:~# ./get-docker.shThen, wait for the installation process to finish.
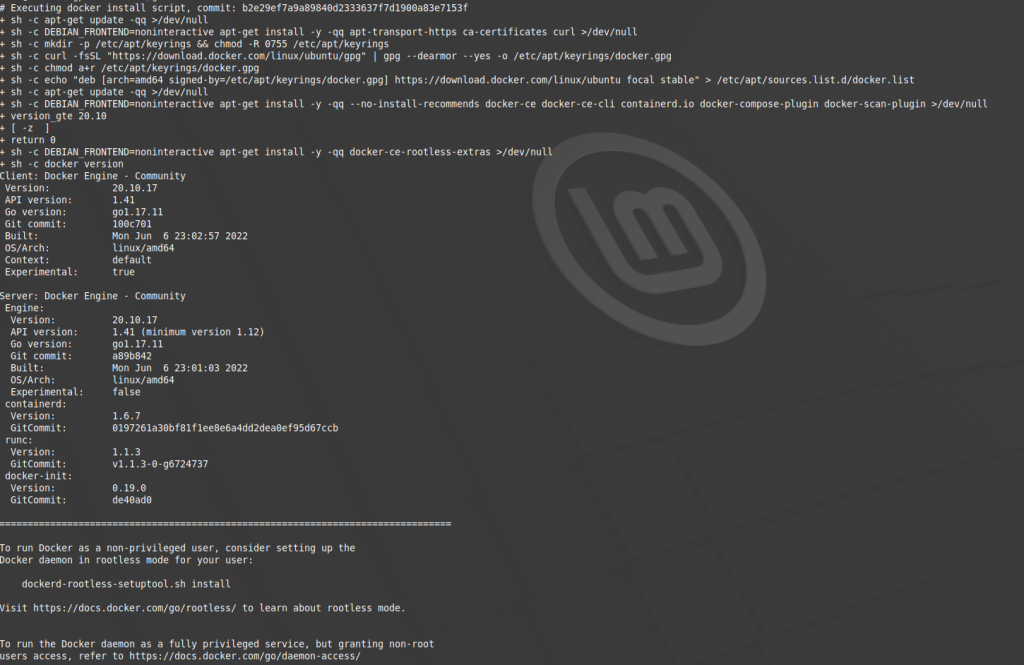
After the installation is complete, test docker-compose to start configuring Nextcloud on Docker.
root@ubuntu-sgp-busan:~# apt install docker-compose -yAfter installing docker-compose, let’s create a docker-compose configuration file to deploy Nextcloud.
Create Configuration docker-compose File
In this section, I will create a docker-compose configuration file for deploying Nextcloud. I use Vim as a text editor here on Linux. You can use any text editor that you prefer, like Nano, etc.
root@ubuntu-sgp-busan:~# vi docker-compose.ymlHere is the content of the docker-compose.yml file after the changes made for the Nextcloud cloud storage on your server.
version: "3"
services:

# databases
 mariadb:
   image: mariadb:10.5
   restart: unless-stopped
   container_name: mariadb
   command: --transaction-isolation=READ-COMMITTED --binlog-format=ROW
   volumes:
     - db:/var/lib/mysql
   environment:
     - MYSQL_ROOT_PASSWORD=nextcloud123@
     - MYSQL_PASSWORD=nextcloud123@
     - MYSQL_DATABASE=nextcloud
     - MYSQL_USER=nextcloud
   cap_add:
     - all
   networks:
     default:
       aliases:
         - nextcloud

# nextcloud
 nextcloud:
   image: nextcloud
   restart: unless-stopped
   container_name: nextcloud
   ports:
     - 8080:80
   volumes:
     - nextcloud:/var/www/html
   environment:
     - MYSQL_DATABASE=nextcloud
     - MYSQL_PASSWORD=nextcloud123@
     - MYSQL_USER=nextcloud
     - MYSQL_HOST=mariadb
   cap_add:
     - all
   networks:
     default:
       aliases:
         - nextcloud

volumes:
  db:
  nextcloud:
Next, I have created a docker-compose file for deploying Nextcloud. After that, run the command to deploy Nextcloud on a private server with Docker.
root@ubuntu-sgp-busan:~# docker-compose up -dThen, wait for the docker-compose up -d process to run.
When the build process with docker-compose completes, check if the application on the container is running properly.

Okay, the Nextcloud container is running properly now.
Configure Firewall to Secure Nextcloud
In this section, you will learn how to make Nextcloud accessible using a domain and how to secure the server with ufw.
Firstly, open the http and https ports to access Nextcloud cloud storage with a private server. Then, enable ufw to ensure the application on the server remains secure and only accesses certain ports. Don’t forget to allow the ssh port before enabling ufw, though.
root@ubuntu-sgp-busan:~# ufw allow ssh
Rules updated
Rules updated (v6)
root@ubuntu-sgp-busan:~# ufw enable
Command may disrupt existing ssh connections. Proceed with operation (y|n)? y
Firewall is active and enabled on system startup
Once that is done, enable http and https ports to allow Nextcloud to be accessed using these ports on the server.
root@ubuntu-sgp-busan:~# ufw allow 80/tcp
Rule added
Rule added (v6)
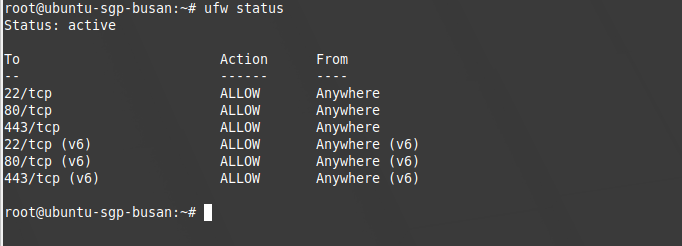
root@ubuntu-sgp-busan:~# ufw allow 443/tcp
Rule added
Rule added (v6)After that, check the status of ufw to see if it is running properly.
Configure Nginx to Access Nextcloud with Domain and Docker
How can you install Nginx to make Nextcloud accessible? By using a domain set up on Nginx Webserver with a reverse proxy.
apt install nginx -yUsing Letsencrypt and Certbot
After installing Nginx, don’t forget to also install certbot to create ssl.
apt install certbot python3-certbot-nginx -yAfter cerbot has been installed, create SSL for the Nextcloud domain. I have used the nextcloud.bettercoffee.dev domain here, as you can see below.
certbot --nginx -d nextcloud.bettercoffee.dev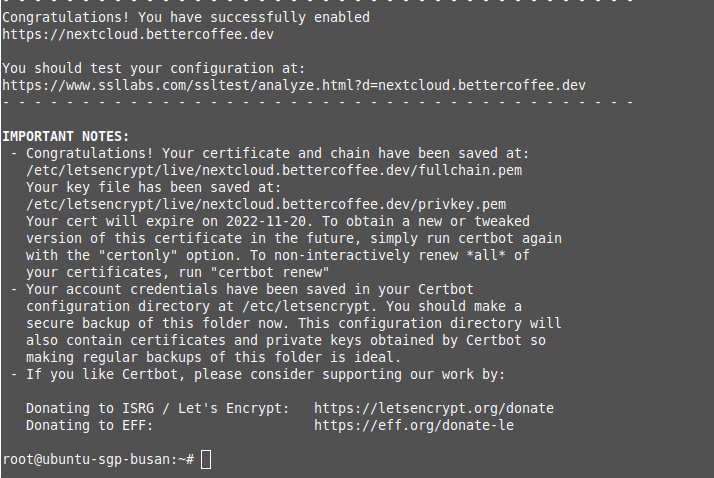
Having generated SSL with the nextcloud.bettercoffee.dev domain, Nextcloud has been made more accessible with the domain. Next, let’s create an Nginx configuration file.
i /etc/nginx/conf.d/nextcloud.bettercoffee.dev.confHere is the content from nextcloud.bettercoffee.dev.conf file.
upstream nextcloud {
  server localhost:8080;
}

server {
  listen 80;
  server_name nextcloud.bettercoffee.dev;
  return 301 https://nextcloud.bettercoffee.dev;
}

server {
  listen 443 ssl http2;
  server_name nextcloud.bettercoffee.dev;
  ssl_certificate /etc/letsencrypt/live/nextcloud.bettercoffee.dev/fullchain.pem;
  ssl_certificate_key /etc/letsencrypt/live/nextcloud.bettercoffee.dev/privkey.pem;

  gzip on;
  gzip_proxied any;
  gzip_comp_level 4;
  gzip_types text/css application/javascript image/svg+xml;

  location / {
    proxy_set_header Host $http_host;
    proxy_pass http://nextcloud;
    proxy_set_header X-Forwarded-Host $host:$server_port;
    proxy_set_header X-Forwarded-Server $host;
    proxy_set_header X-Forwarded-For $proxy_add_x_forwarded_for;
  }
}
Then, to check if the Nginx configuration is working properly, test it.
root@ubuntu-sgp-busan:~# nginx -t
nginx: the configuration file /etc/nginx/nginx.conf syntax is ok
nginx: configuration file /etc/nginx/nginx.conf test is successful
After thar, simply reload Nginx with this command:
root@ubuntu-sgp-busan:~# nginx -s reloadOpen Nextcloud: Private Cloud Storage with Server on Browser
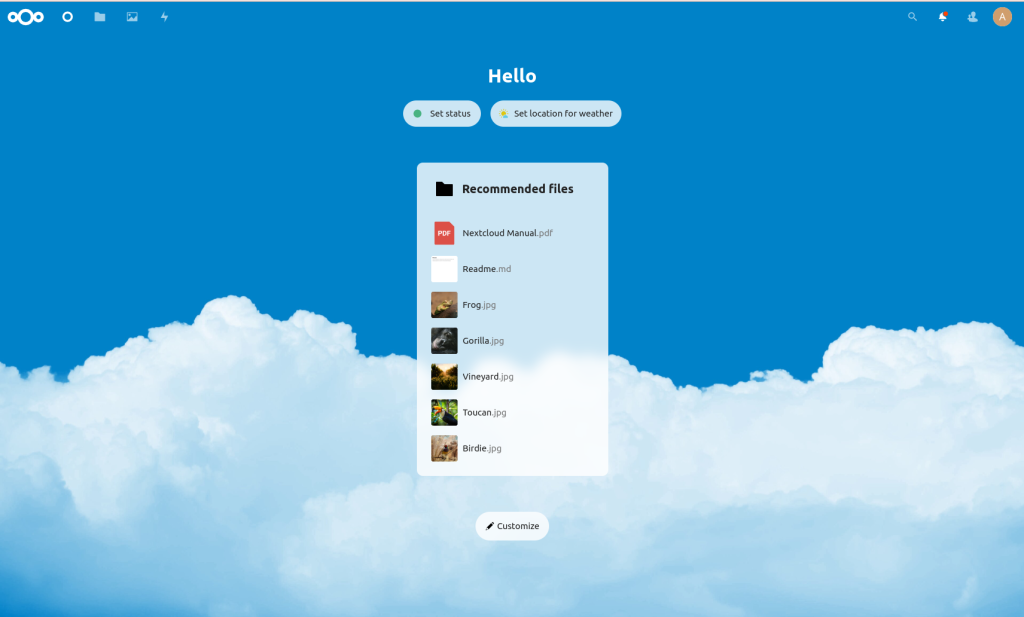
You have finished setting up the domain on Nginx! Now, you can access Nextcloud in the browser using the domain we already set up.
To do that, I have opened a browser– Google Chrome, but you can use any browser you prefer– to access Nextcloud with this domain set up on the Nginx server.
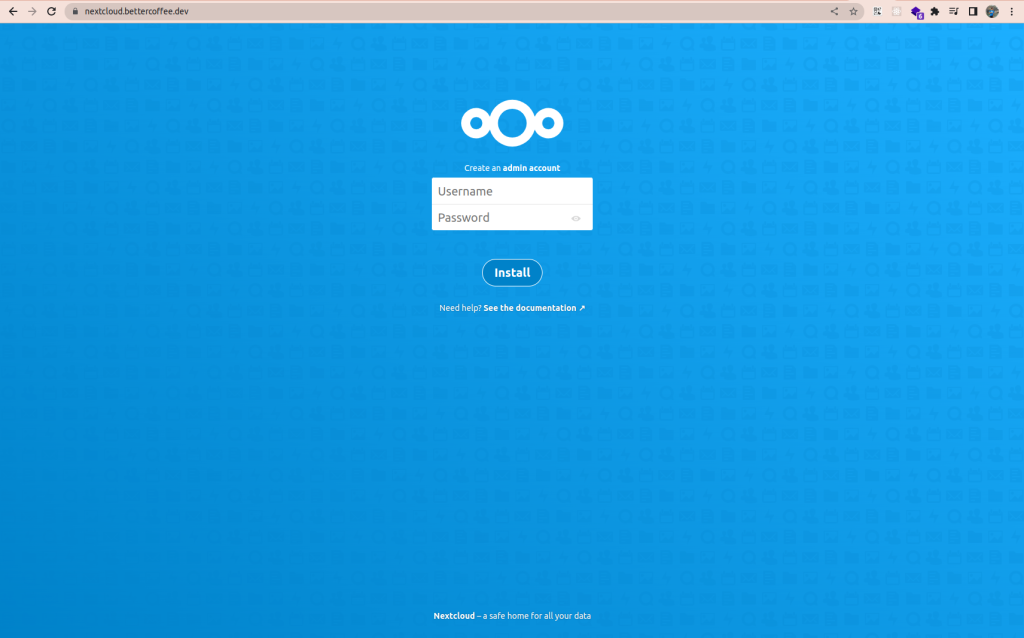
After that, create an admin username and password to configure Nextcloud. Then, click install and wait for the installation to complete. After the installation, you will be presented with an option to install recommended apps. You can cancel if you want; that’s what I chose.
Great! You have successfully installed Nextcloud on our private server with Docker.
Now, let’s try to upload the file using the Nextcloud dashboard. Cool, the file has also been uploaded successfully!

Create a User to Login to Nextcloud Cloud Storage
At this point, you can create a user to log in to your Nextcloud cloud storage. If you want to create a user, select a page on the profile and select users.
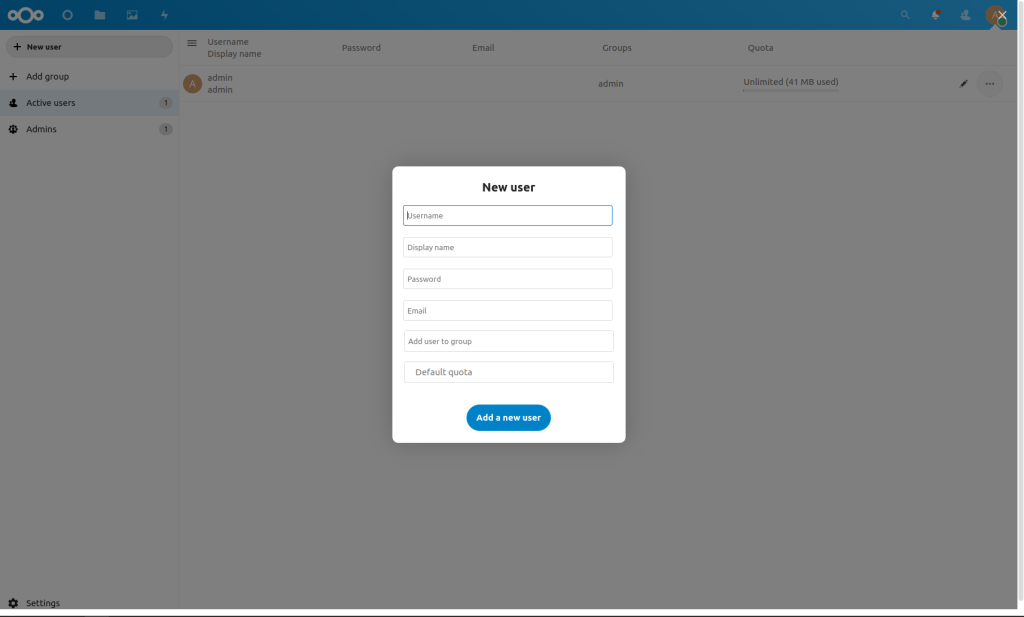
To add a user from the users’ page Nextcloud, you can select the new user option in the left corner, then add a username, display name, password, and email. You can also add that user to your group if you have a group.
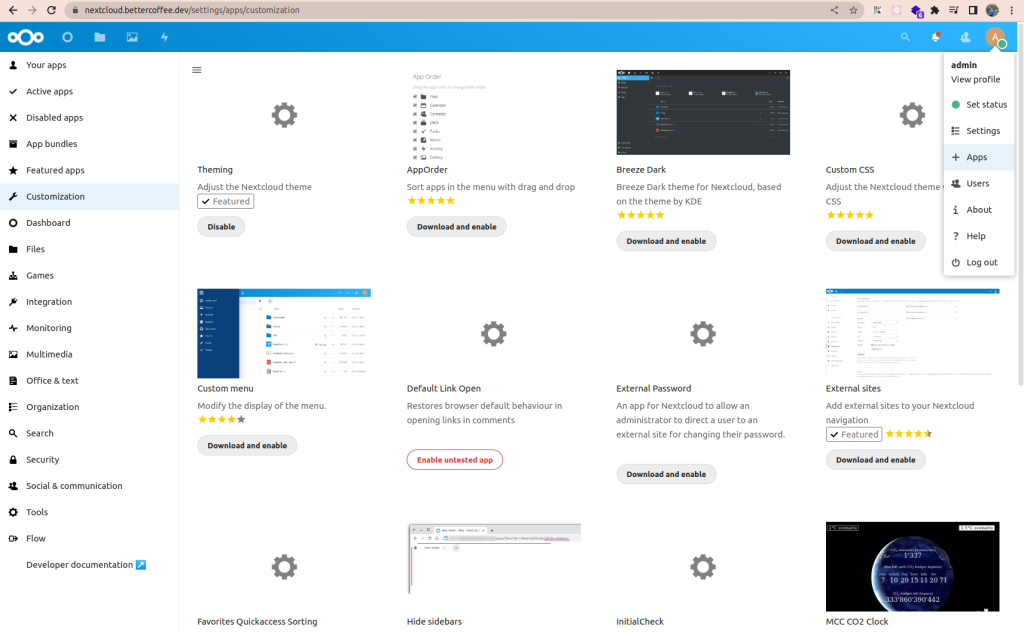
There are many features in Nextcloud, one of which lets you you customize the display and add other apps contained in Nextcloud. We can see all the features on the app page in the profile.
Conclusion: Deploy Nextcloud Cloud Storage with Docker
Nextcloud has many features for me to recommend to build it on your server. With Nextcloud, you can collaborate with people in your organization and add users for your needs, make customizations on Nextcloud, and, of course, create private cloud storage for you to use. With all these advantages in the Nextcloud enterprise version, you need to add more costs to get dedicated support from Nextcloud after you select a tier. But you can also use the Nextcloud community for your help.
Suppose you don’t want to bother building a cloud storage server in your organization. In that case, you can use Nihao Cloud with several advantages, including trying freemium for free accessing cloud storage and saving your data on Nihao Cloud. Your file gets secure with end-to-end encryption and is guaranteed to be secure for you to use. When you have business in various places, and maybe one of them is in china. You can use Nihao Cloud as your preferred cloud storage provider.
If you like this post, please let me know below. I would love it if you commented below if you learned something form this post or if you face any issues in this tutorial. There are many exciting posts on our blog you can check out if you enjoyed this one. Fingerprint Matching in Python and Video Conferencing with Jitsi on K8s are a couple of examples.
Edited by: Syed Umar Bukhari.